Why do we take pictures of debris? All debris data are evidence in our investigations about what debris washes in, and which characteristics are present that might pose a risk to humans and wildlife. Photos support accurate identification and verification of debris characteristics – making our debris dataset useful for analyzing trends!
So what makes a good picture?
- In focus (so any text that might be present is legible)
- Includes the whole object plus a scale, a filled out photo slate (see below), and a solid background
- Does not include shadows or too much background/scenery – debris should be the star!
The PHOTO SLATE (aka chalkboard)
COASST-issued photo slates include 15 cm of yellow and black stripes taped along one edge for a size reference. If yours doesn’t have a ruler, you can use your own OR include one side of your 50 cm sampling square in the frame. (You can also shoot us an email and we will send you a new one!)
COASSTers get creative when filling out the photo slate, and as long as we can read all relevant information, we don’t mind how you get the job done!

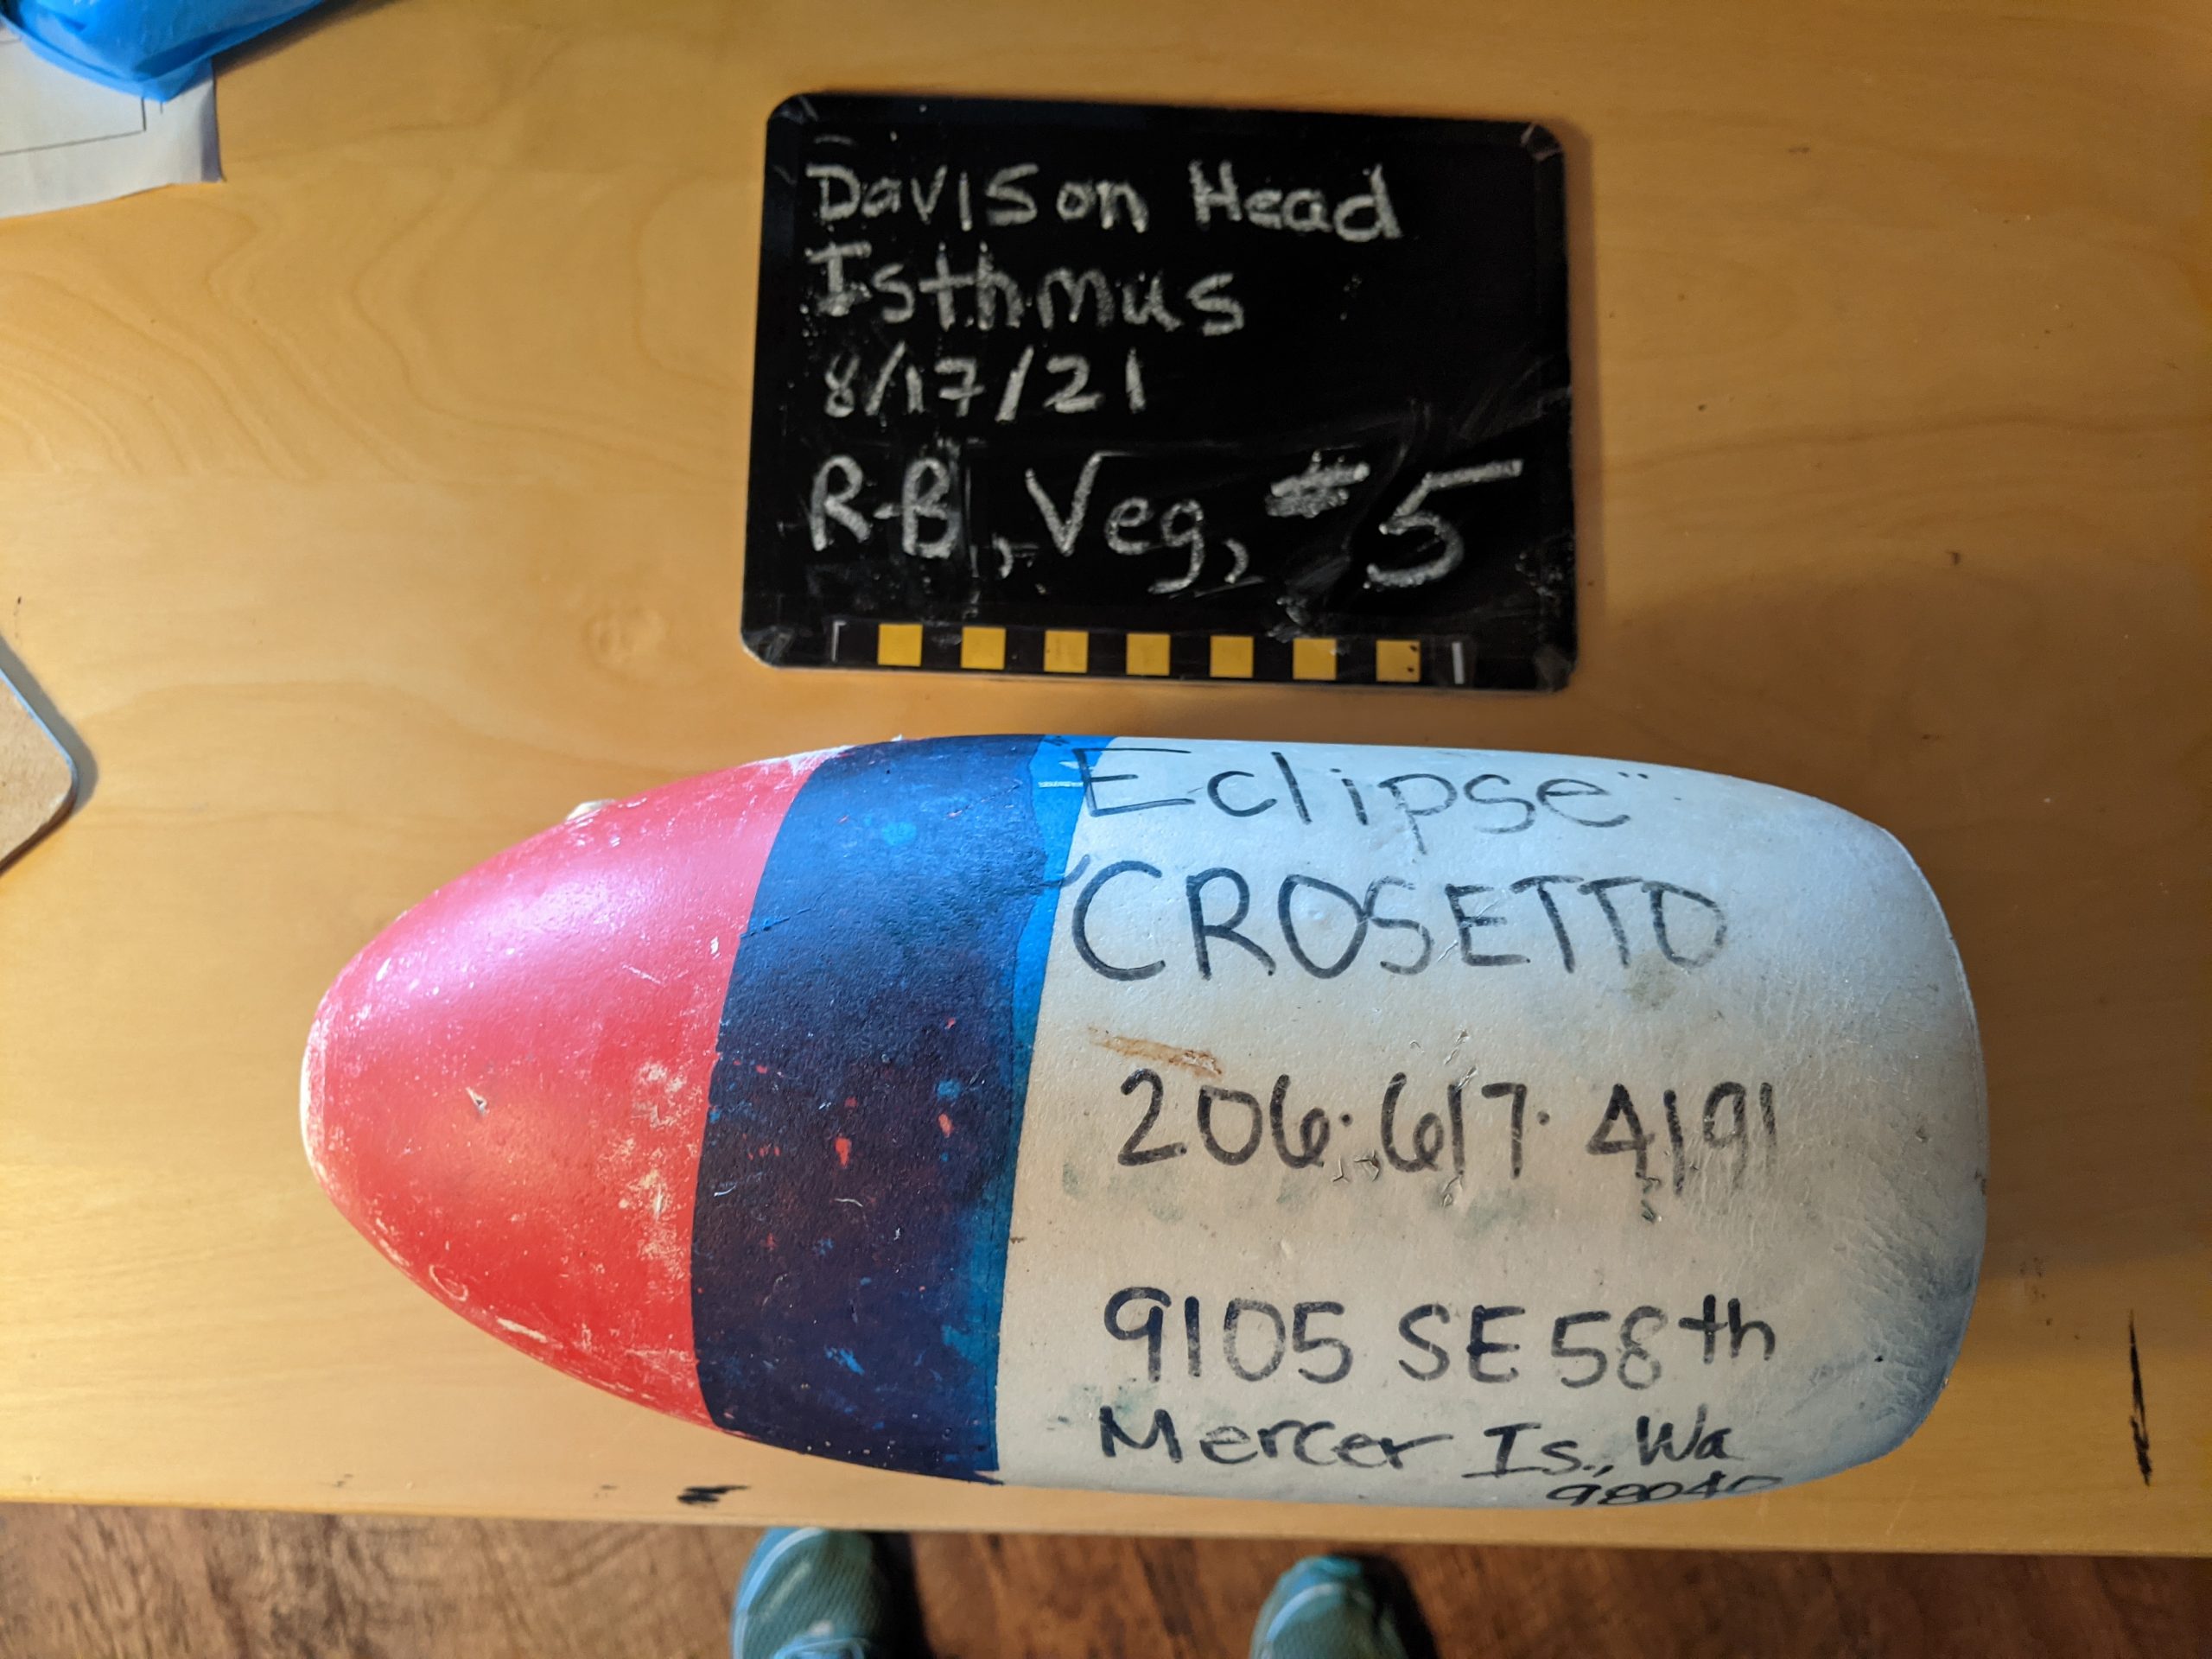
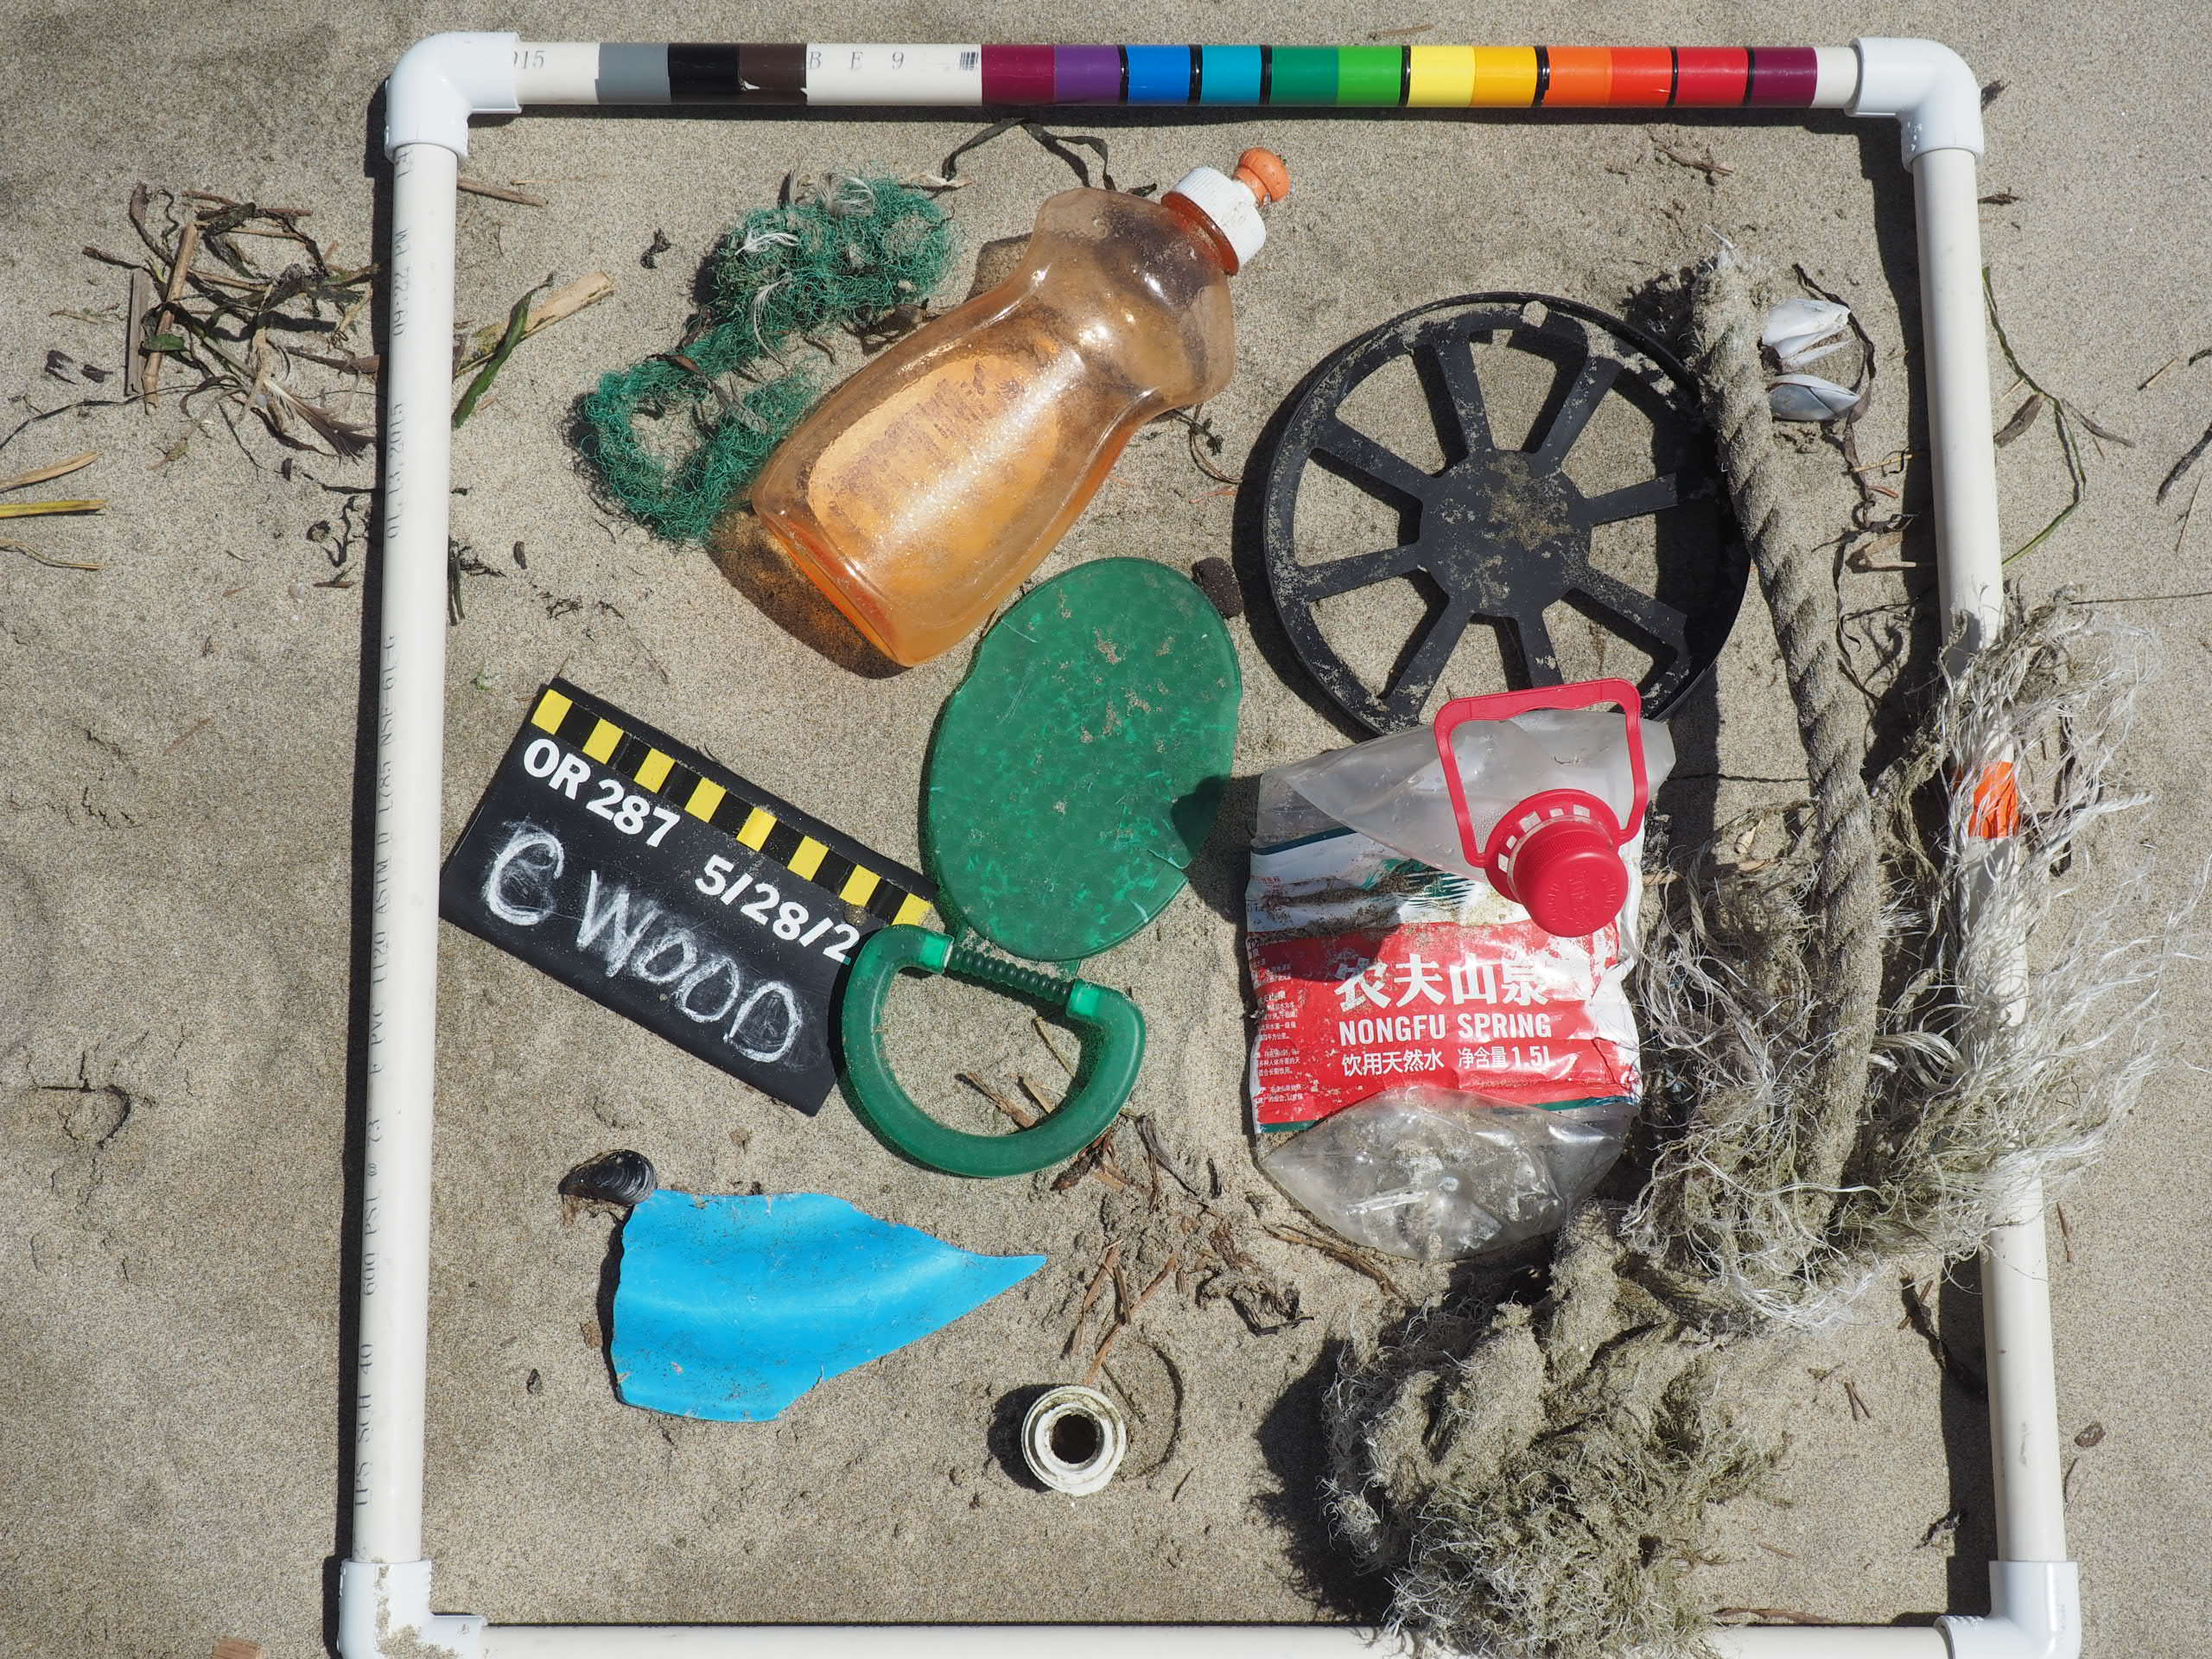
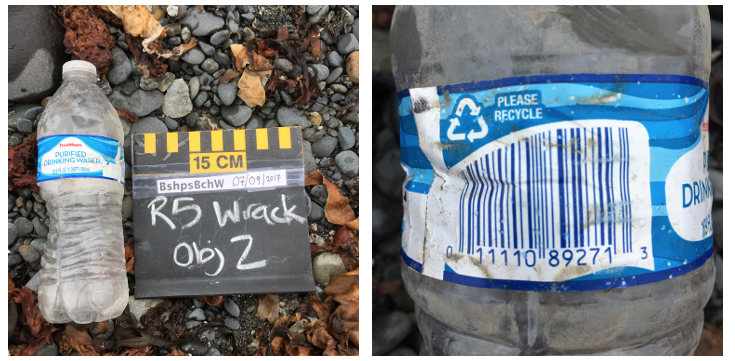
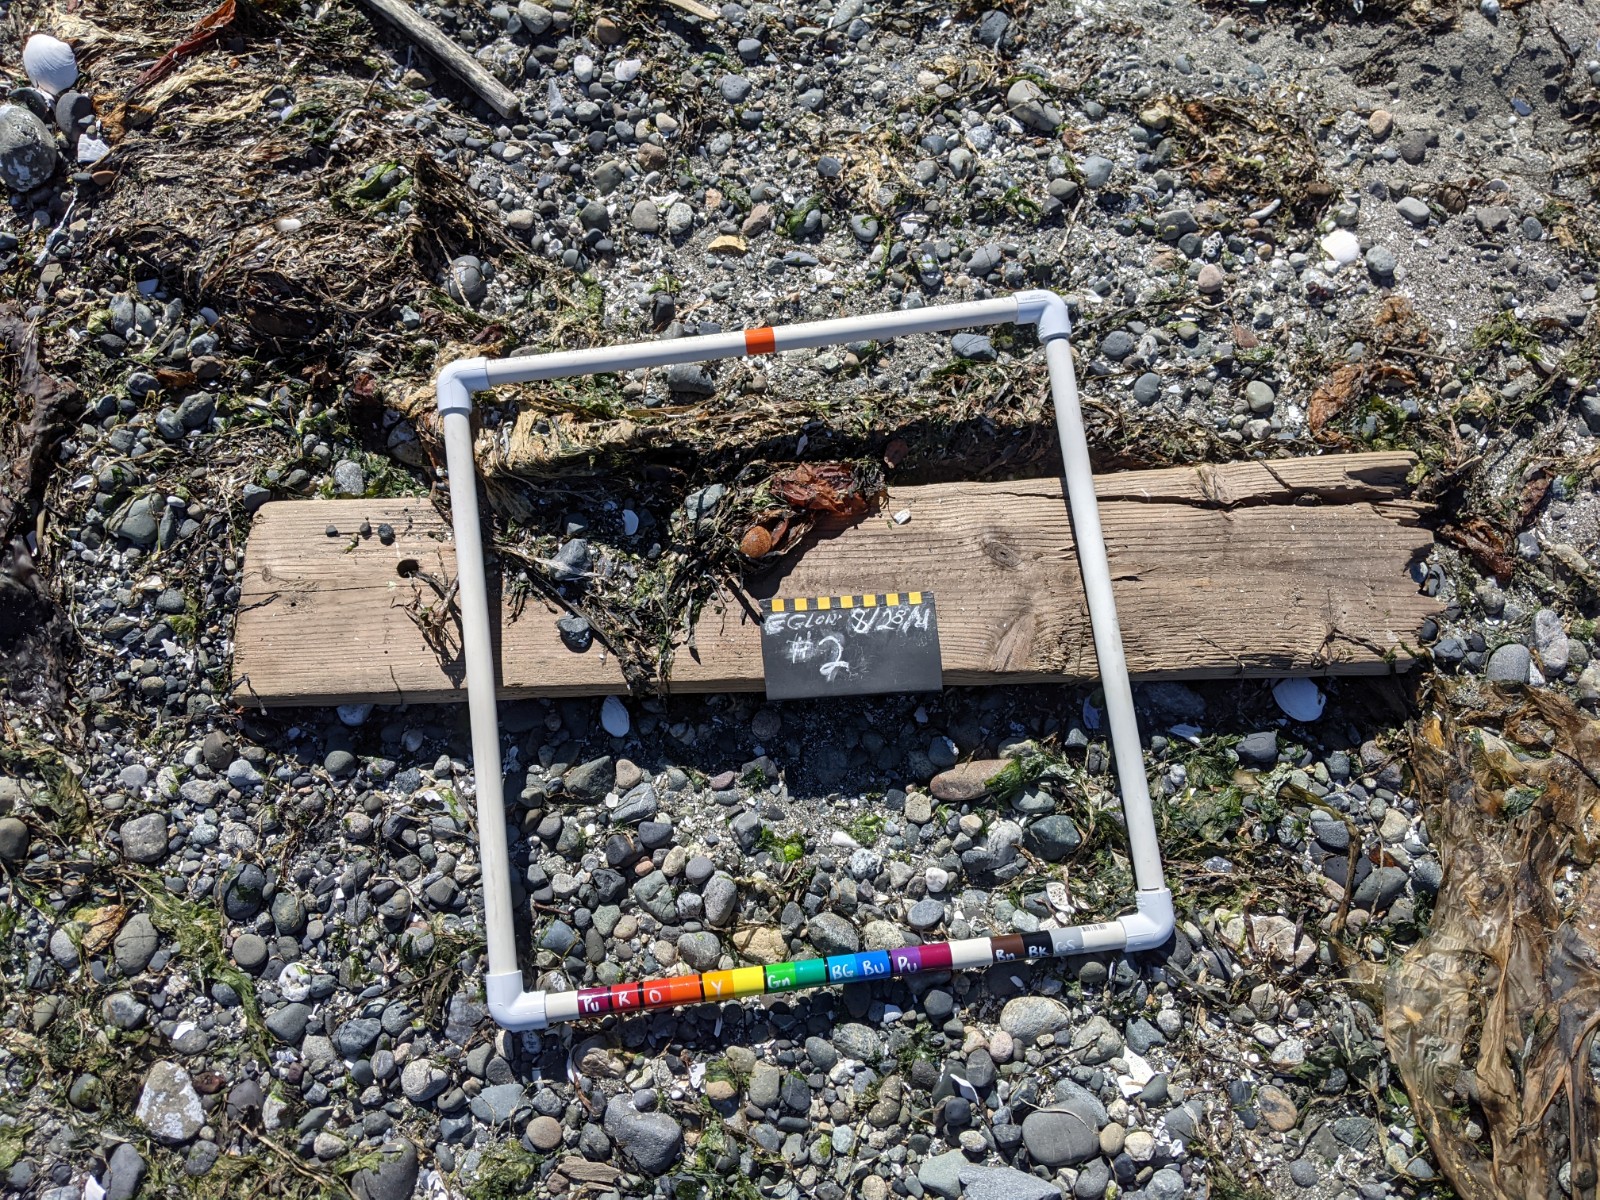
This photo has a complete Photo Slate! In addition all writing is visible on debris item, the debris item stands out against the background and the whole object is in visible in the frame. This item stands out against the background and the slate is filled out with Object Number, Rectangle and Zone where it was found . If they fit in a single frame, Medium Debris found in a Zone together can be photographed together! The sampling rectangle is useful here as a scale and color comparison. This Large Debris item fits completely in the frame and a Photo Slate completes the photo.
Each survey type requires slightly different information on the photo slate:
| Survey Type | Slate Information |
| Small Debris | Beach name, Date, Rectangle, Zone, Square # |
| Medium Debris | Beach name, Date, Rectangle, Zone, Object #(s) |
| Large Debris | Beach name, Date, Zone, Object # |
How many photos should you take?
There should be at least one photo of every unique debris item found on a survey (ie. one photo per line of data). If you are tallying medium or small debris, items that are tallied can be gathered in the same photo. If you are tallying large debris items, that means you only need to snap a photo of the first item of that type found on that survey.
In addition, some characteristics require additional photographs: biofouling, barcodes, language, brands and poison.
You’ll see a camera icon (like the one here) on the data sheet as a reminder to submit additional photos!
A few tips, for each debris size
Large Debris:
Take at least a single photo of each unique large debris item. Very large items may require multiple photos at different angles to ensure we can see the whole object. The photo slate should be included in each photo.
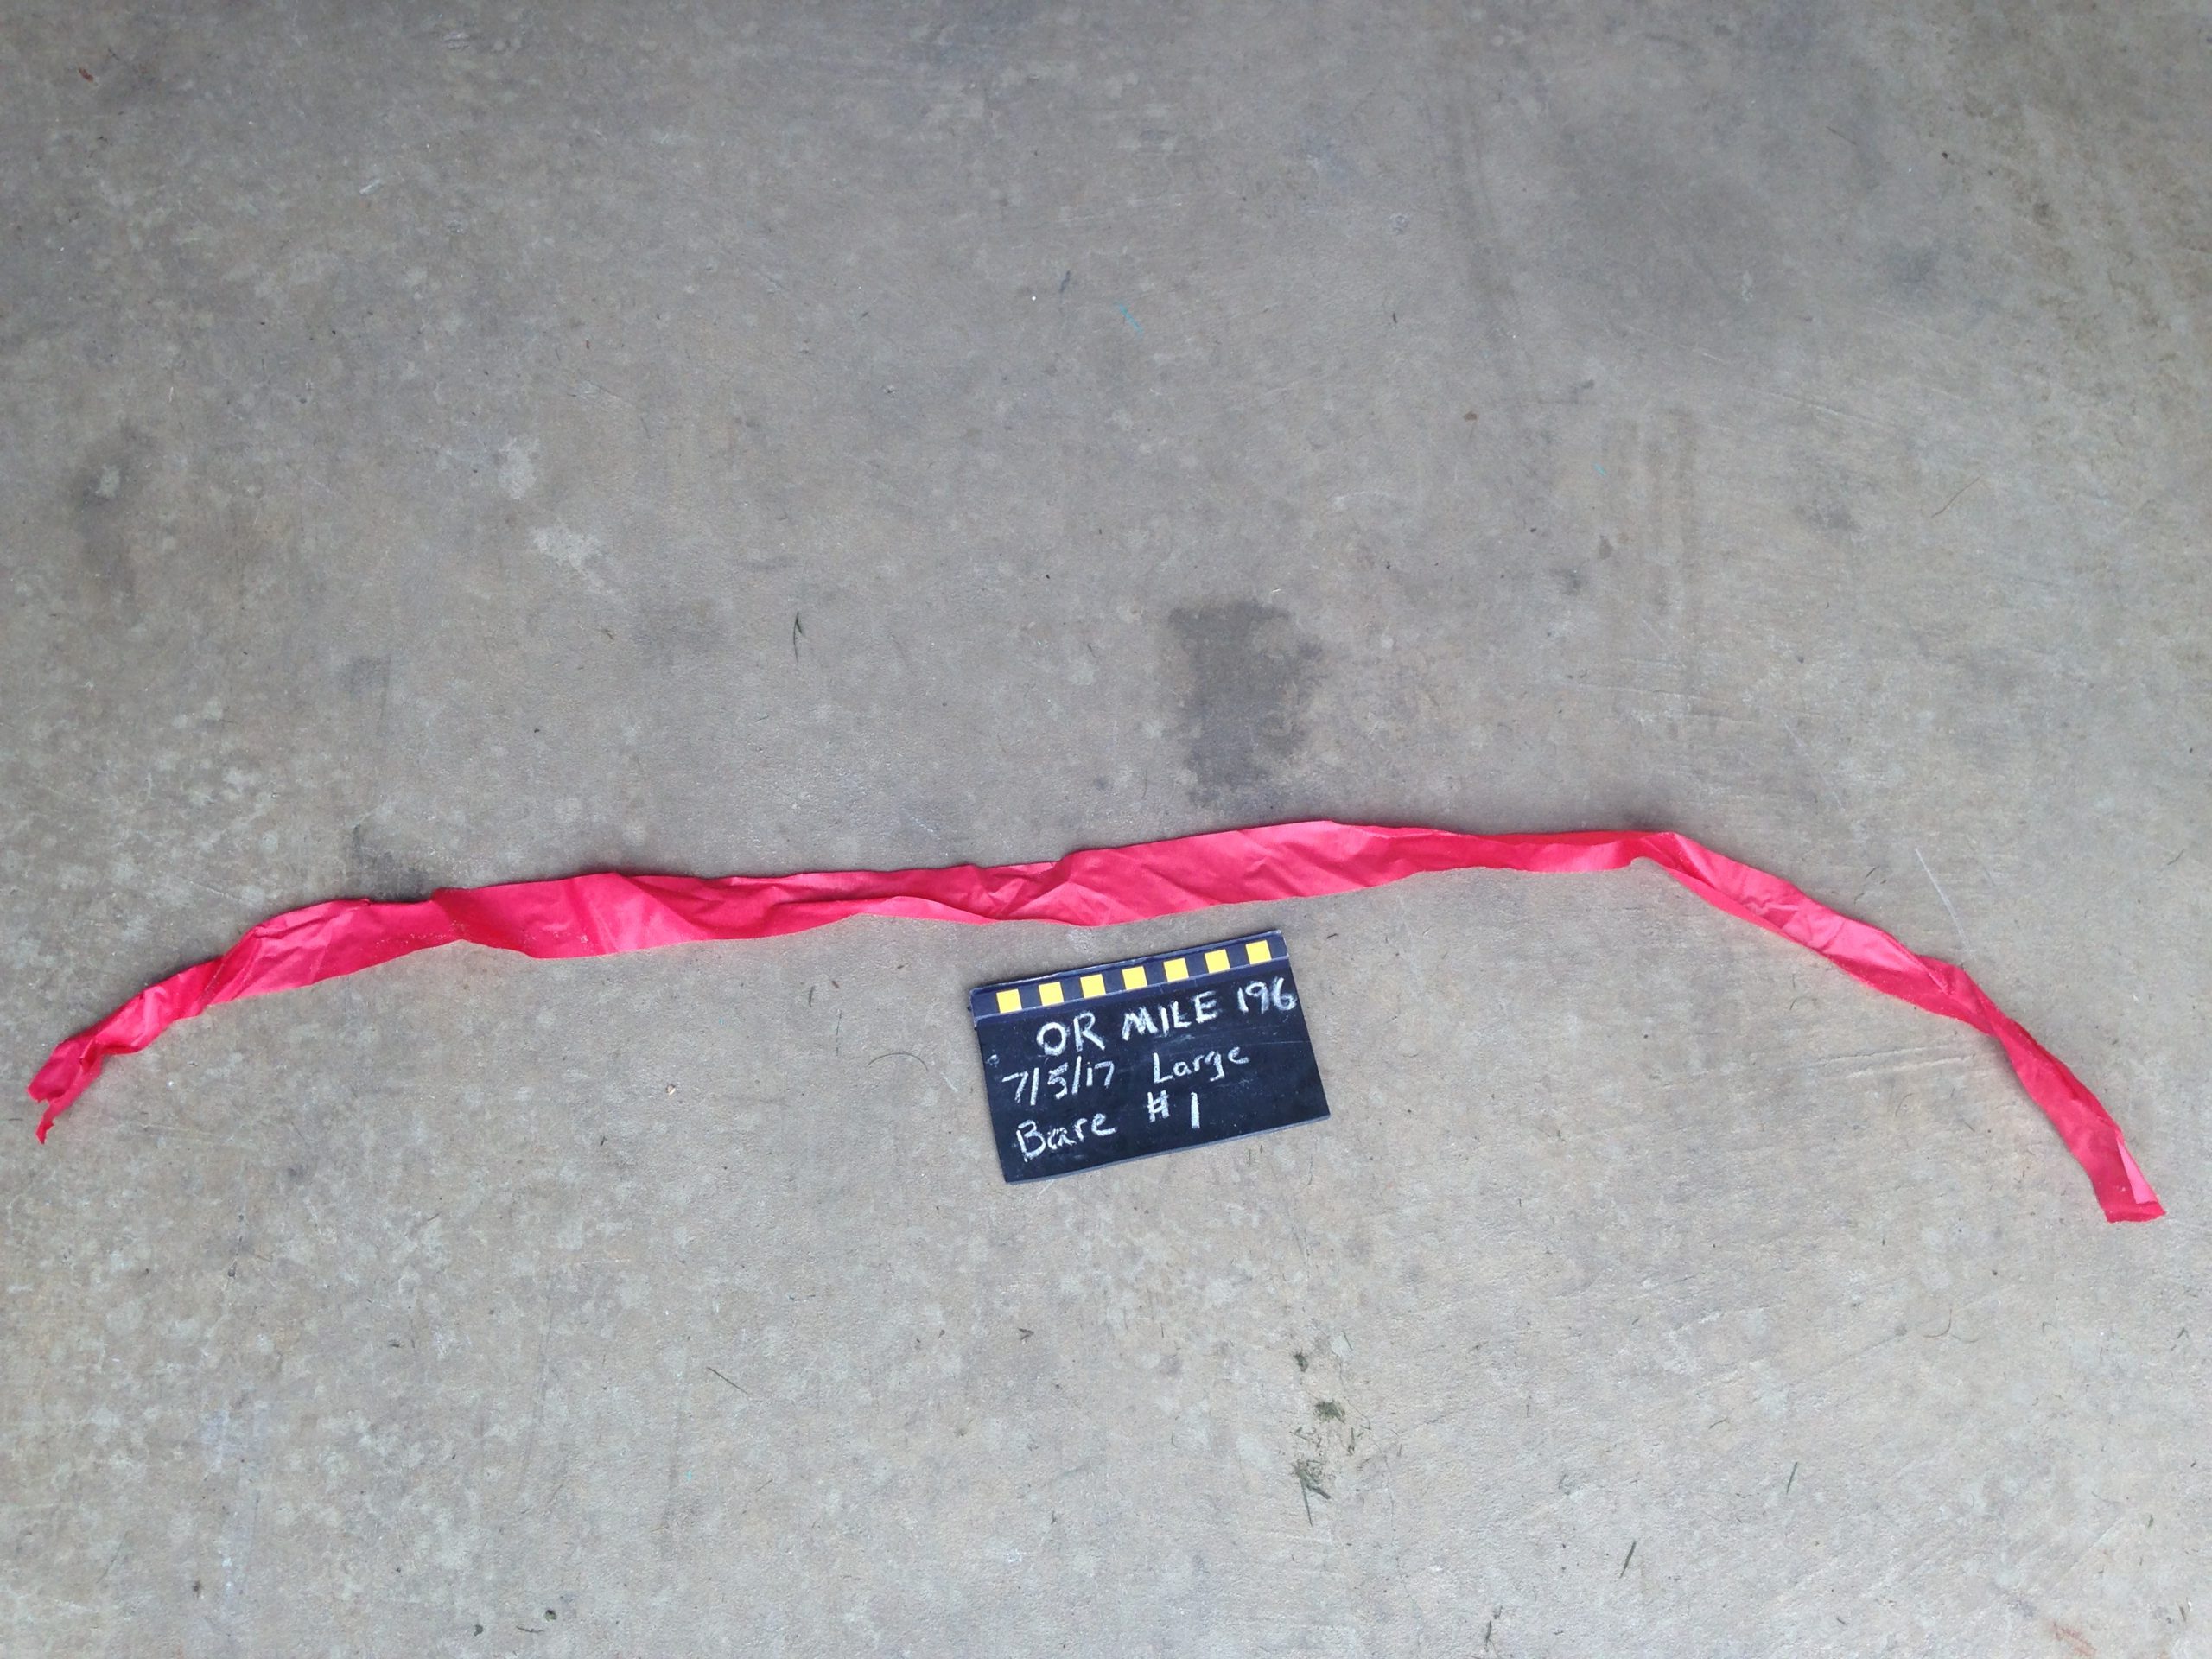
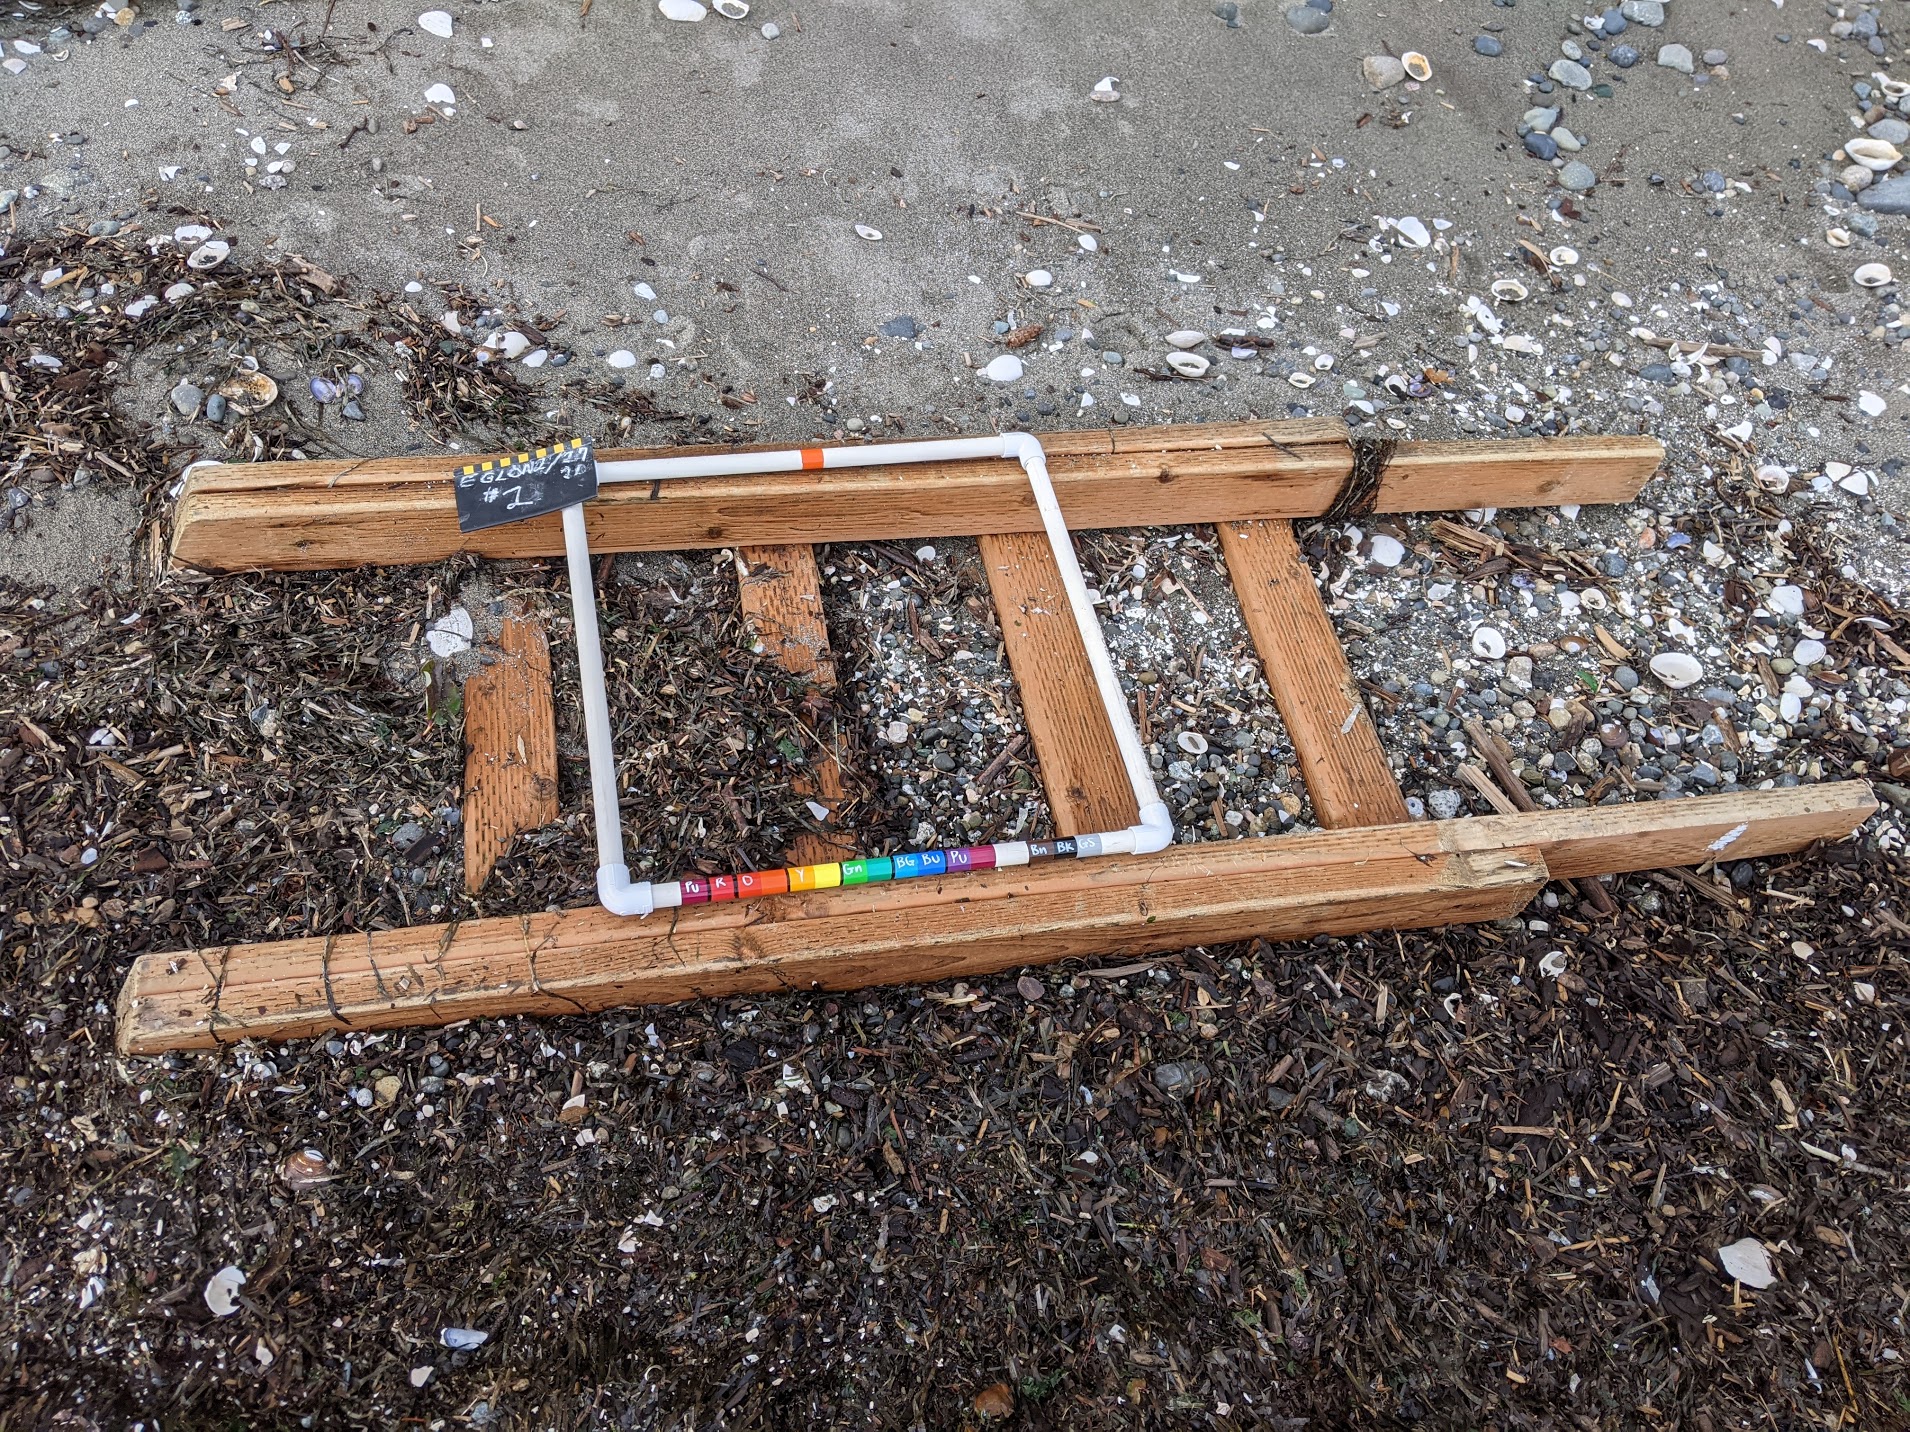
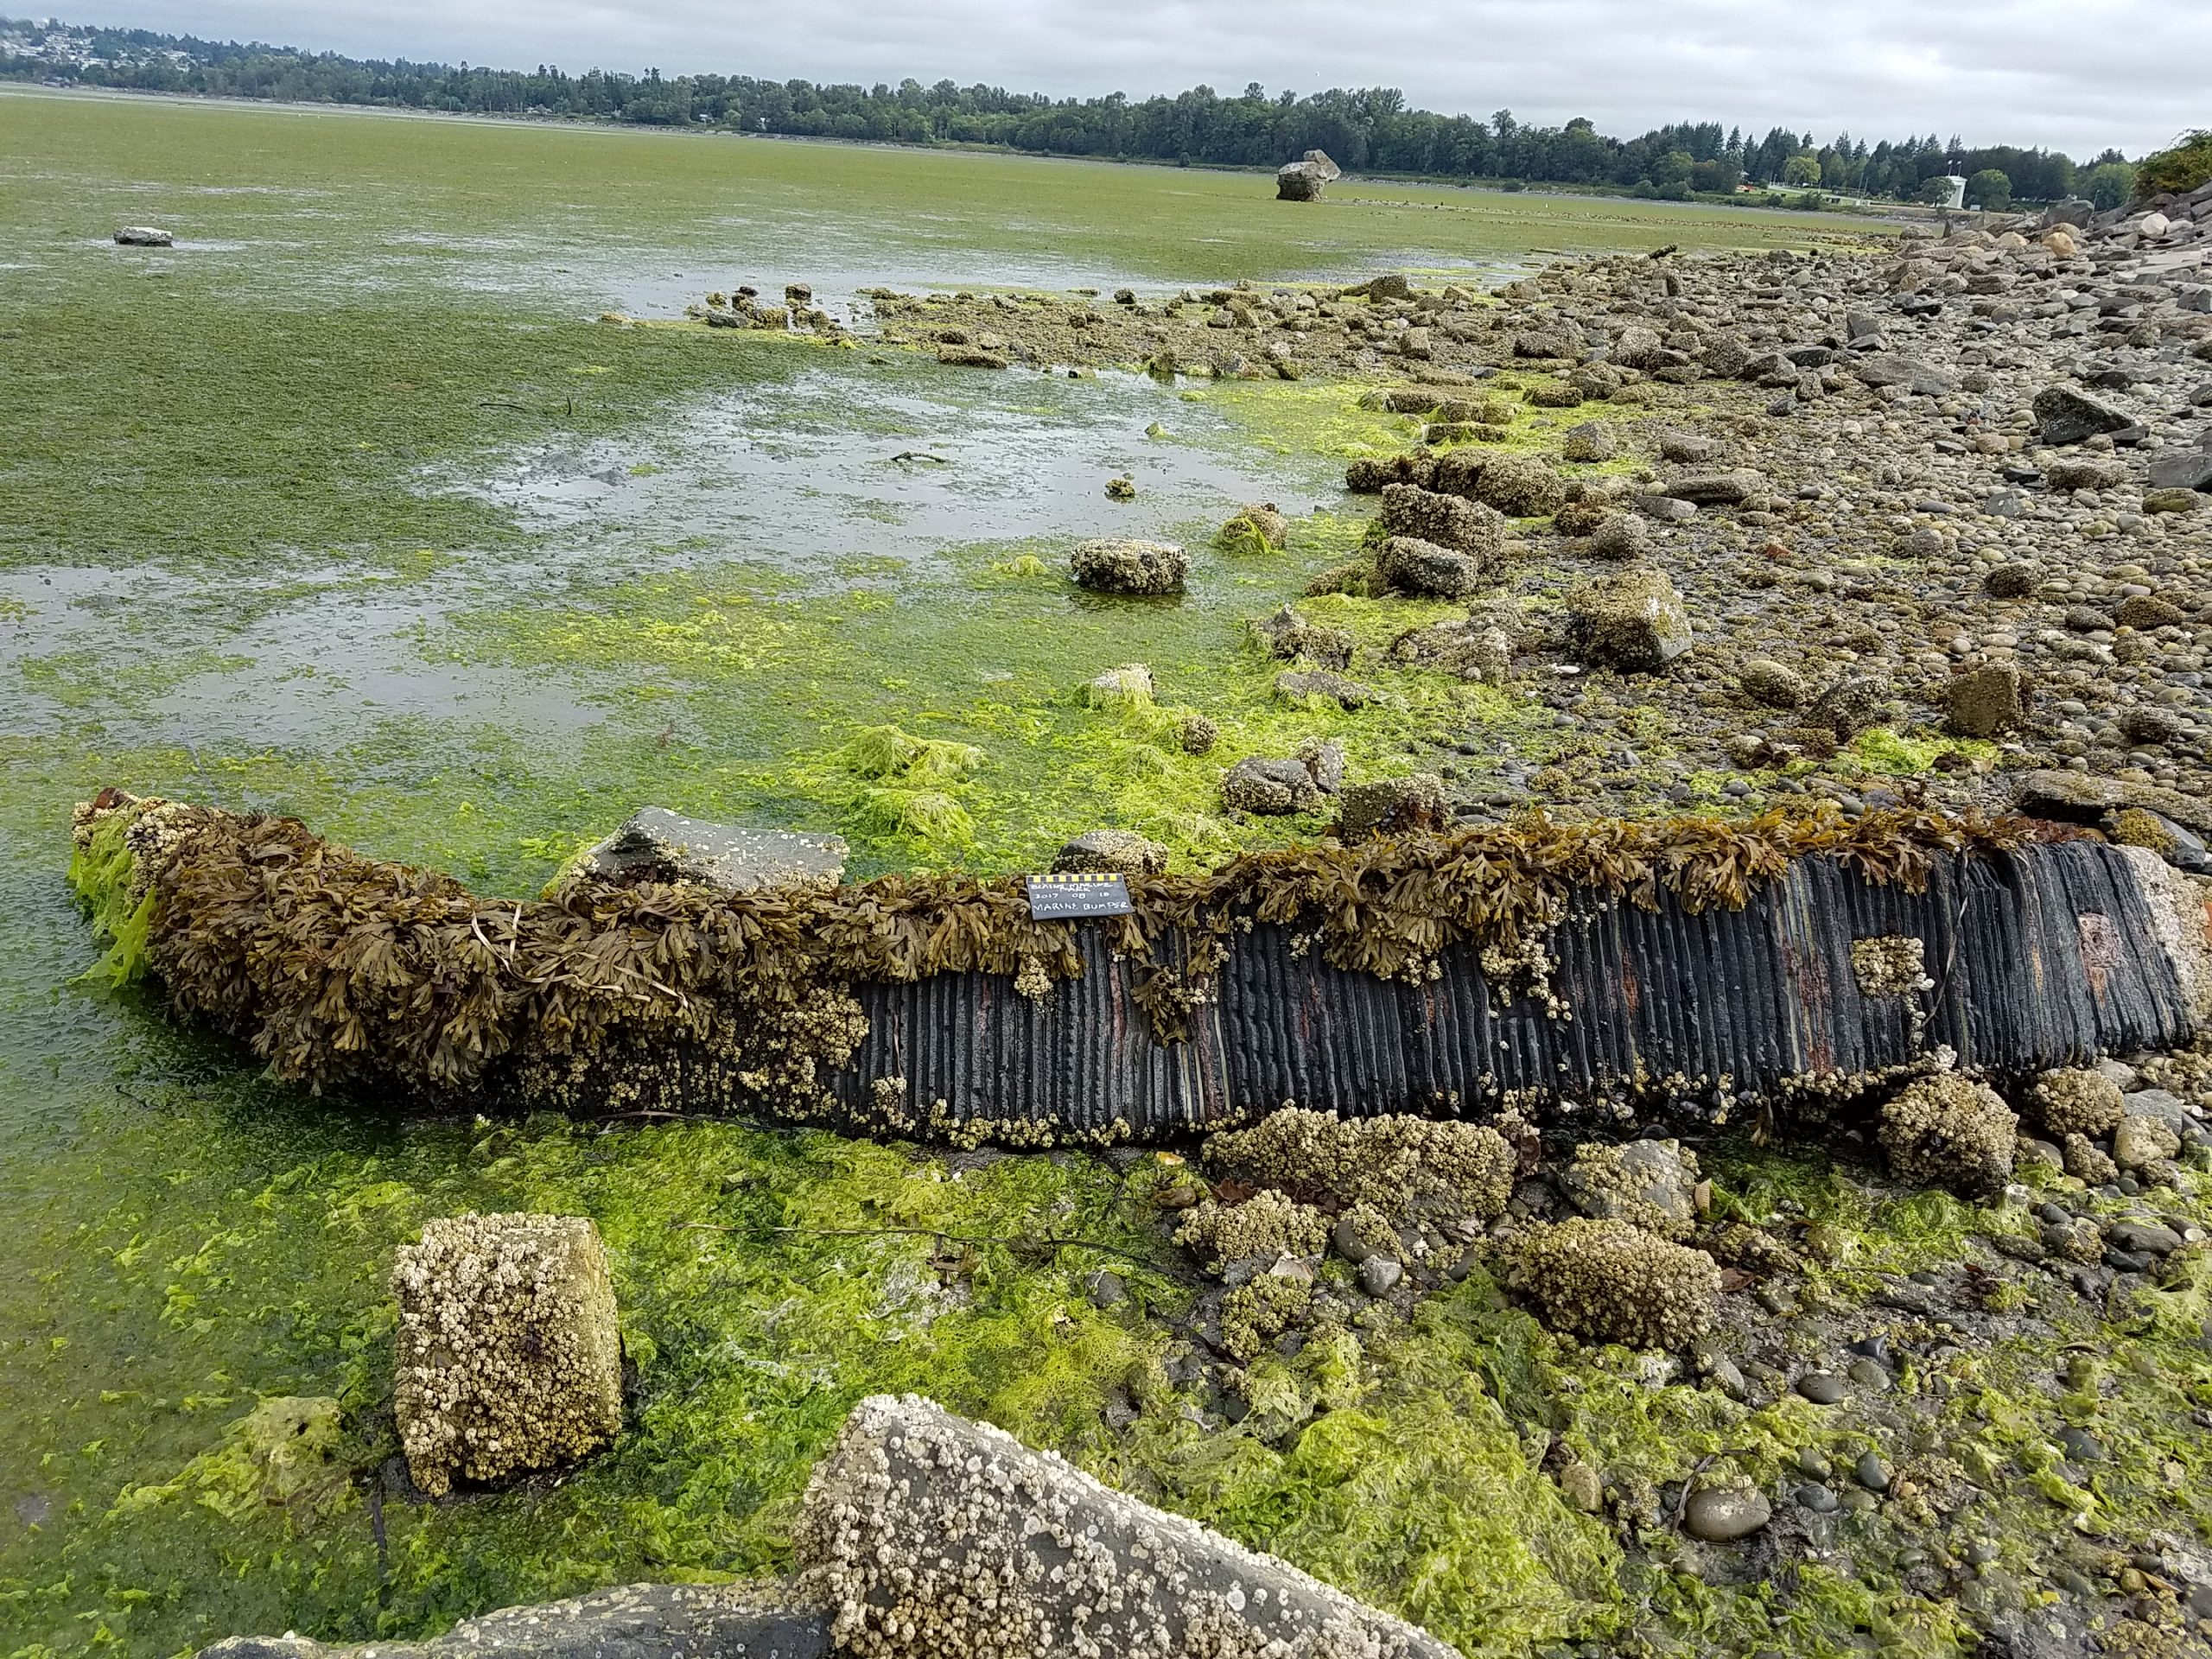
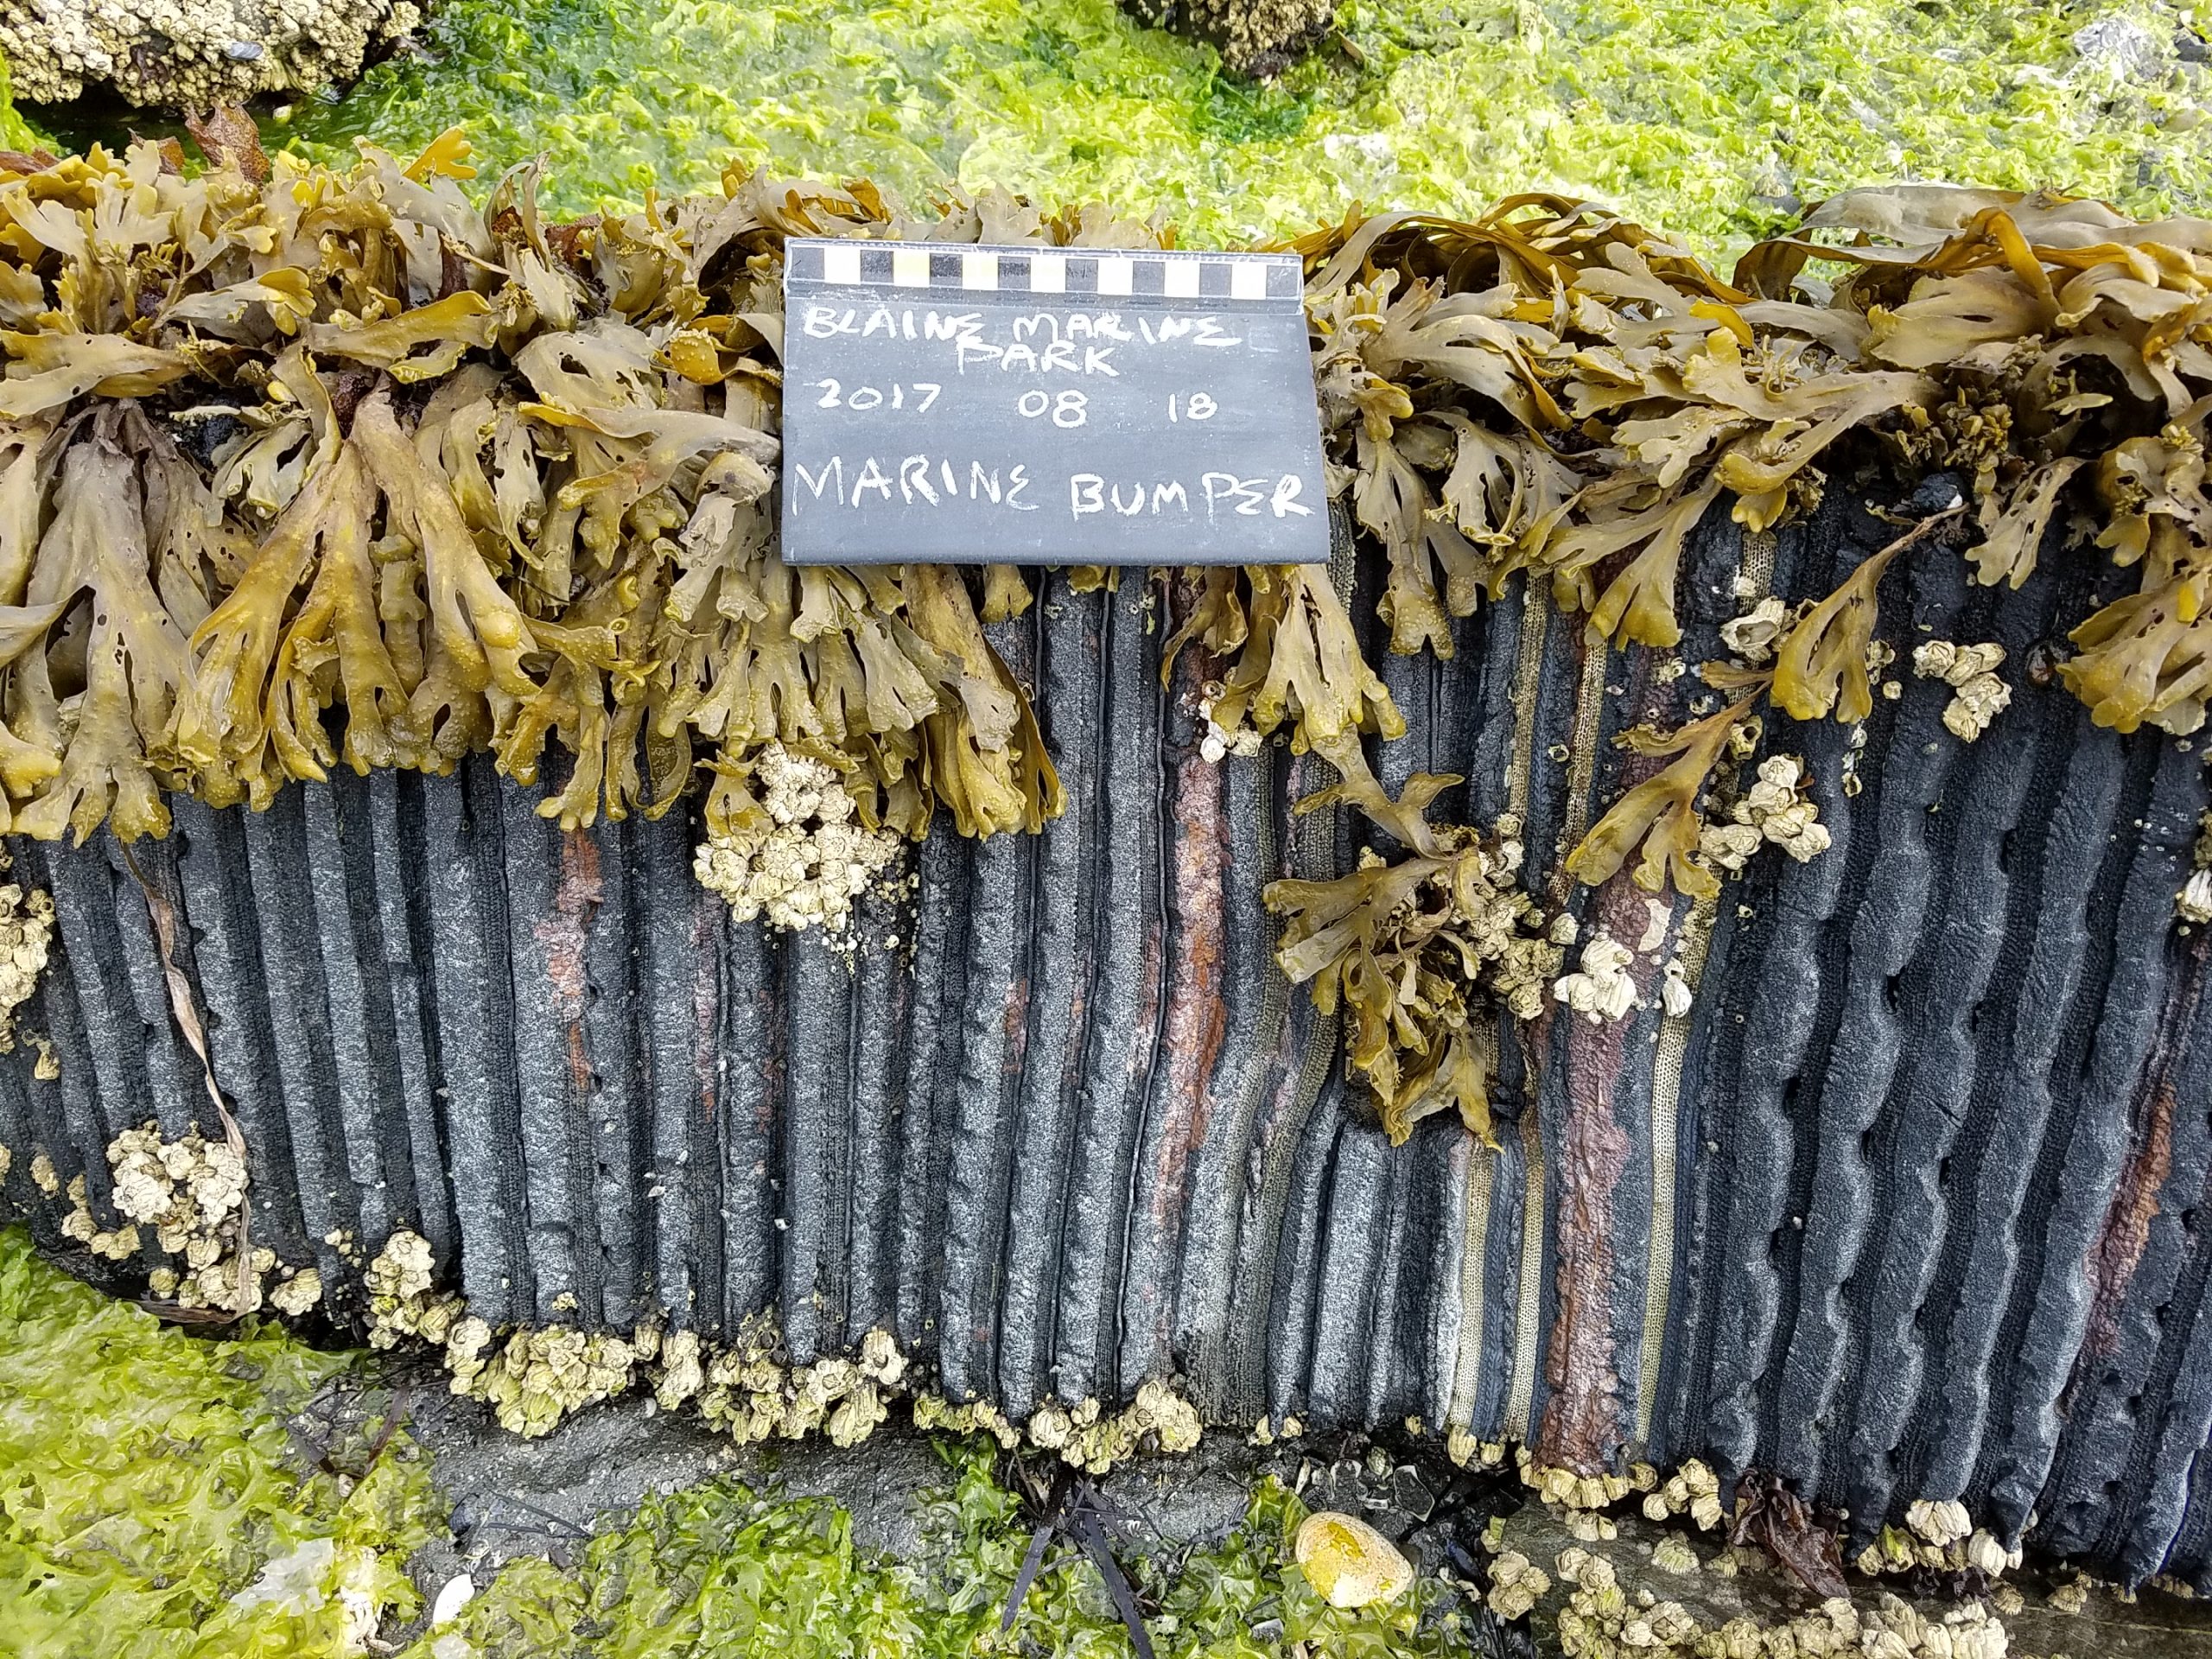
This photo of a ladder is a good example of a Large Debris item photographed in-place. The full item is in the frame, the Photo Slate is filled out, and the square is used for size comparison. This marine bumper was so long that the photographer probably had to step back to fit the whole item in the frame! Additional photos of details were needed (see next photo). This close up ‘detail’ picture shows biofouling and the texture of the bumper, helping us confirm that it is rubber. The whole piece of lumber fits in the photo frame here – nice! Brushing off the wrack (unless it’s attached biofouling) would make this photo even better.
Fitting the whole object in the frame can take some creativity! You might try to orient the object on a diagonal, try to shoot from above, or take a few steps back.
Small and Medium Debris Group Photos:
For small and medium debris surveys, many surveyors choose to characterize and photograph debris after leaving the beach. Items bagged and tagged at the beach for later characterization are already sorted by square (small debris) or zone and rectangle (medium debris).
Please feel free to submit photos with the debris sorted in these groupings! Make sure to arrange the debris items so all are visible, and don’t forget to take additional photos if there are characteristics like biofouling and poison that require it.
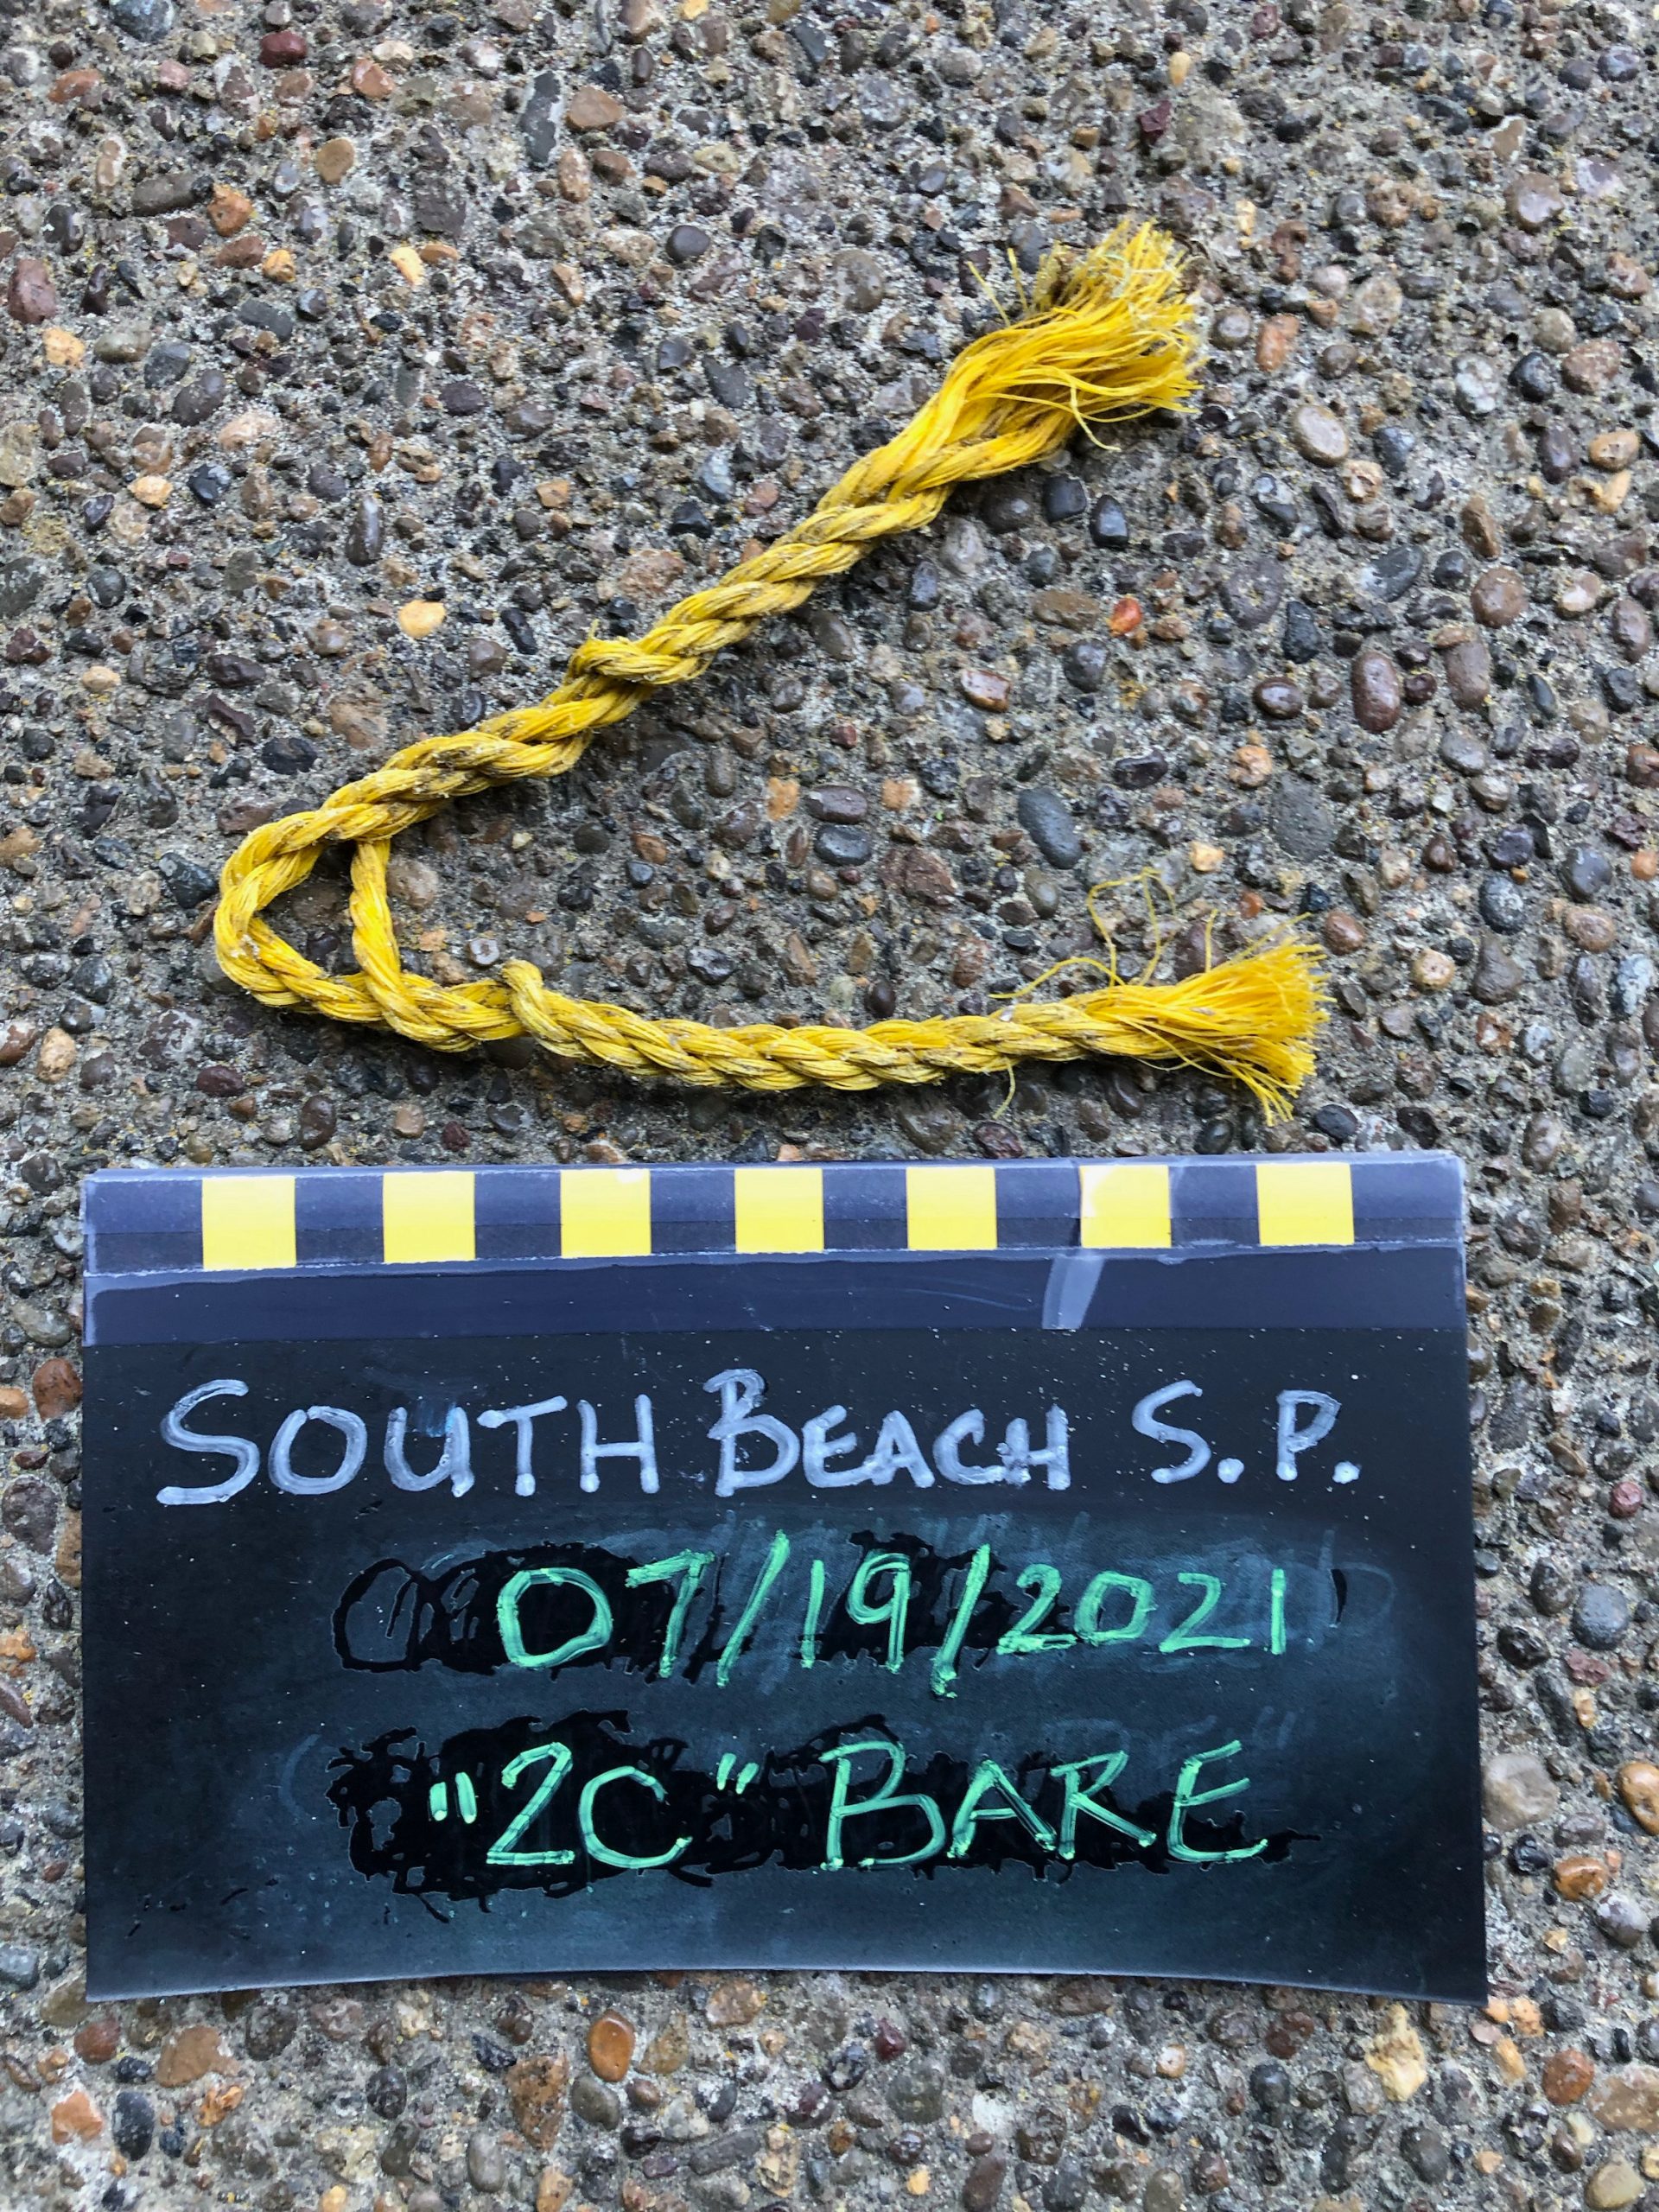
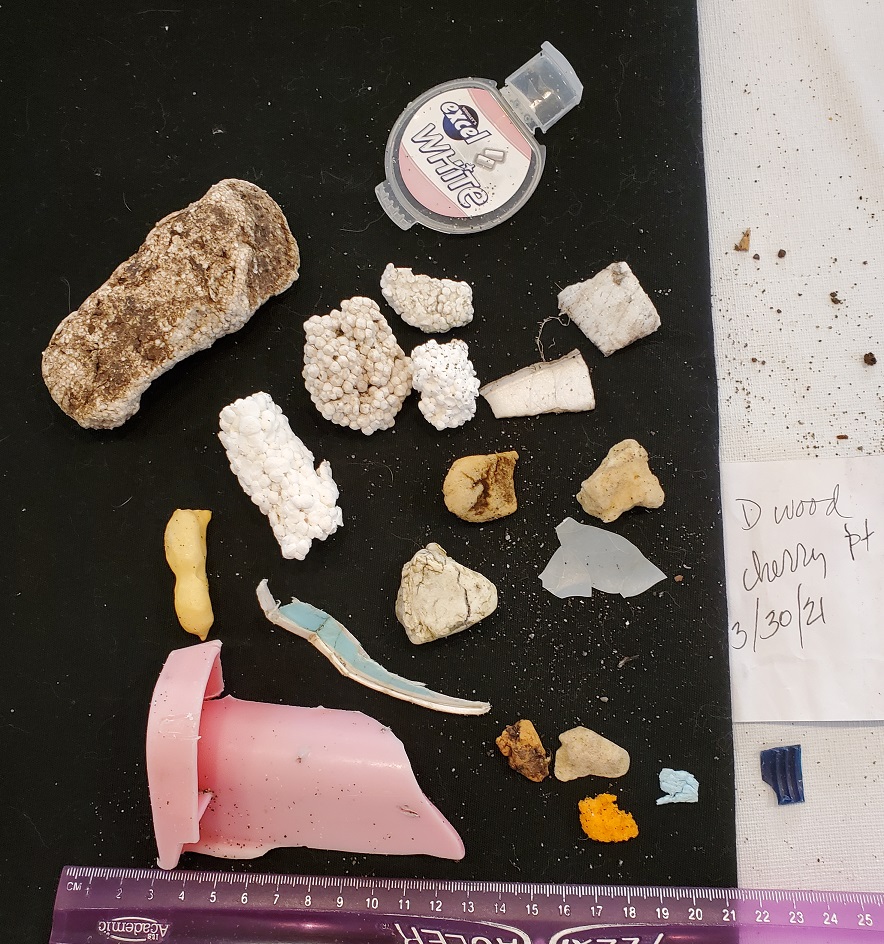
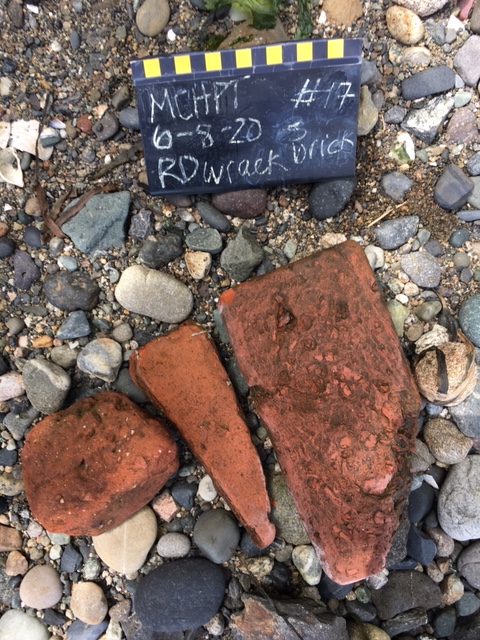
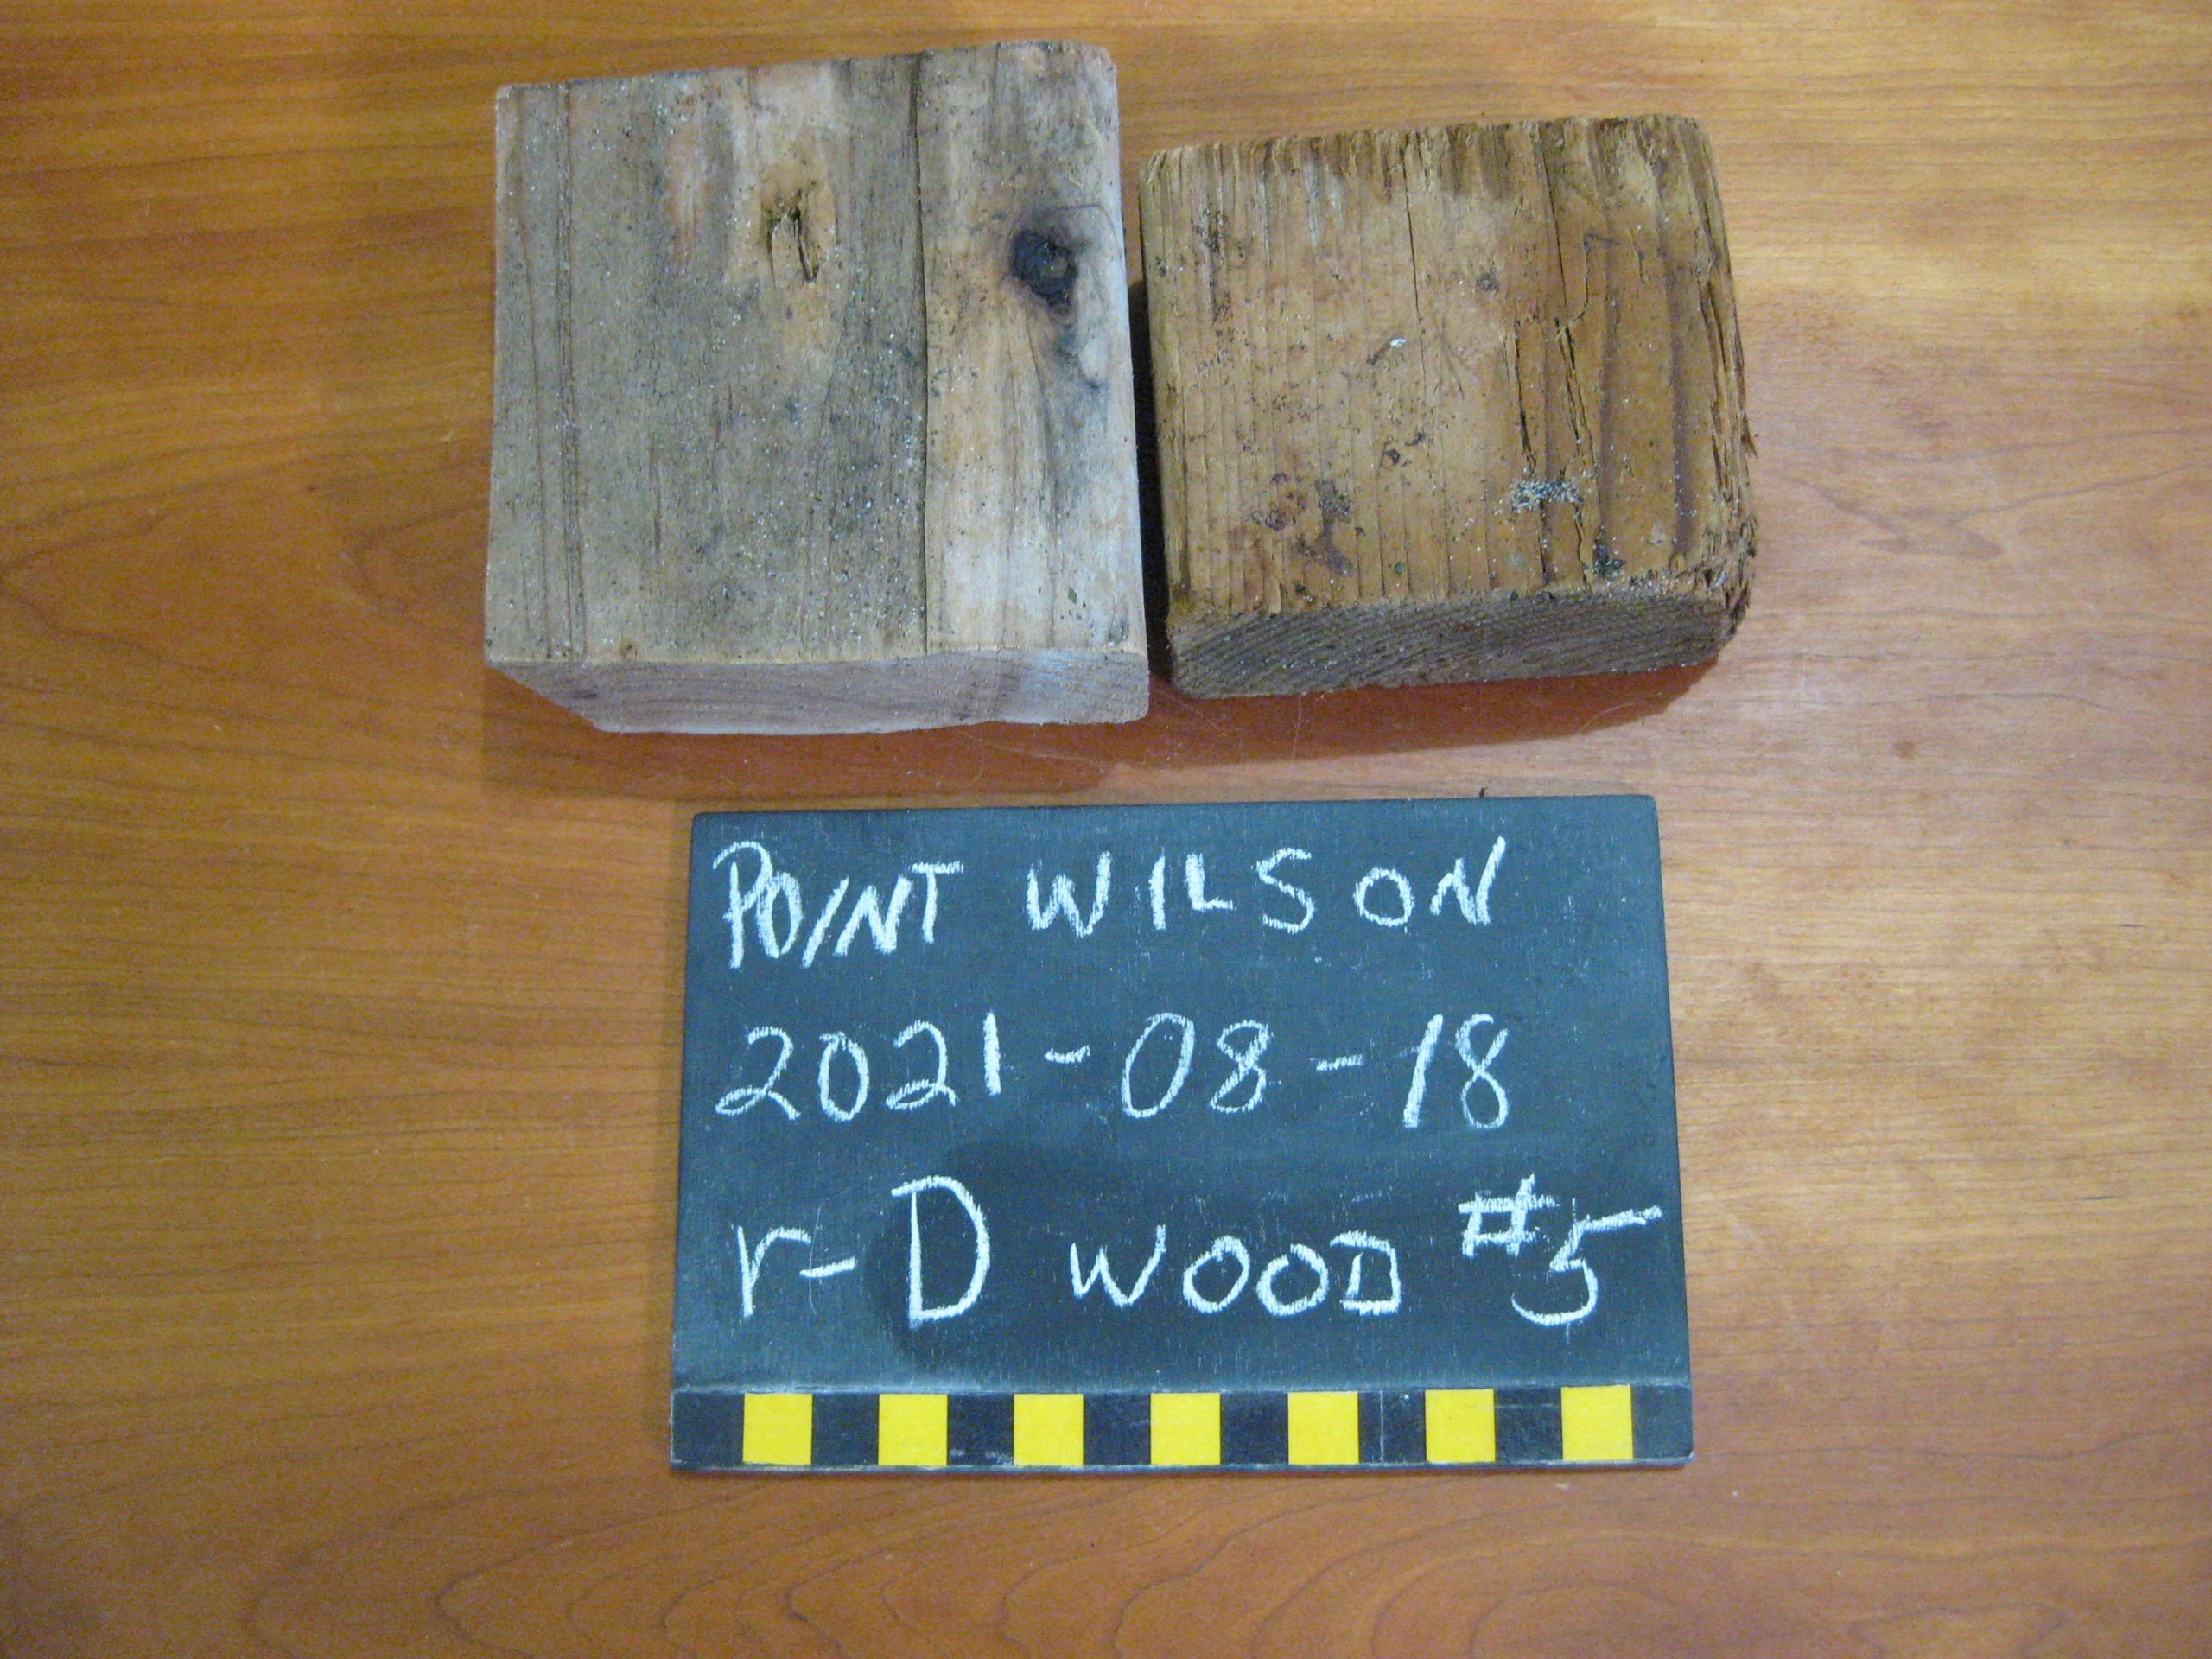
This at-home characterization is common for Medium Debris surveyors. Here, all items standout against background, a personal ruler shows the scale, and the bag-and-tag post-it contains all information normally conveyed by the Photo Slate. In this example of on-the-beach characterization, all Items are in the frame, and the Photo Slate is completely filled out. Tallied Medium Debris Items can be photographed together! These pieces of wood are identified as Item #5 in the Photo Slate. These fragments of Small Debris are photographed together (with a complete Photo Slate) and will be tallied together.

Thank you to our participants, who submitted these excellent example photos with their recent surveys! Featuring: Jan Zall (Davison Head Isthmus), Michael and Carol Kerton (South Beach State Park), John Goertzen and Roger Miller (Oregon Mile 287), Paul and Gail Pardi (Oregon Mile 196), Paul Allan and Louise Ashmun (Bishop’s Beach West), Sherri and David Fuller (Eglon), Laura Friend (Blaine Marine Park), Sally Schoenberg (Cherry Point), Natalie Niblack and Ann Reid (March Point), and Eric Dingeldein (Point Wilson)!