Why do we take pictures of beached birds?
Like chain-of-custody in a criminal court case, our beached bird data is fully documented from the start – complete with a handwritten data sheet and photographs of the evidence. That’s because one of the original reasons for COASST surveys was documentation of ‘baseline’ levels of mortality that could stand up even in a court of law following an oil spill!
The COASST dataset is collected by thousands of people over decades, but because we all collect and document data in the same way, that data is useful and trusted by a wide range of data users – from natural resource managers to academics.
Beached bird data is also independently verified here in our home office at the University of Washington. With good photos submitted along with evidence like measurements and foot type family, we are able to help surveyors identify >95% of beached bird carcasses all the way to the species level.
So what makes a good picture?
- In focus, with a solid background
- Includes the whole bird – no missing wing tips!
- Includes a scale ruler
- Includes a filled out photo slate (see below)
- Does not include shadows or too much background/scenery – the bird should be the star!
The PHOTO SLATE (aka chalkboard)
COASST-issued photo slates include 15 cm of yellow and black stripes taped along one edge for a size reference. Bird surveyors have a bonus scale ruler which you can place beside a measurable part for direct comparison.
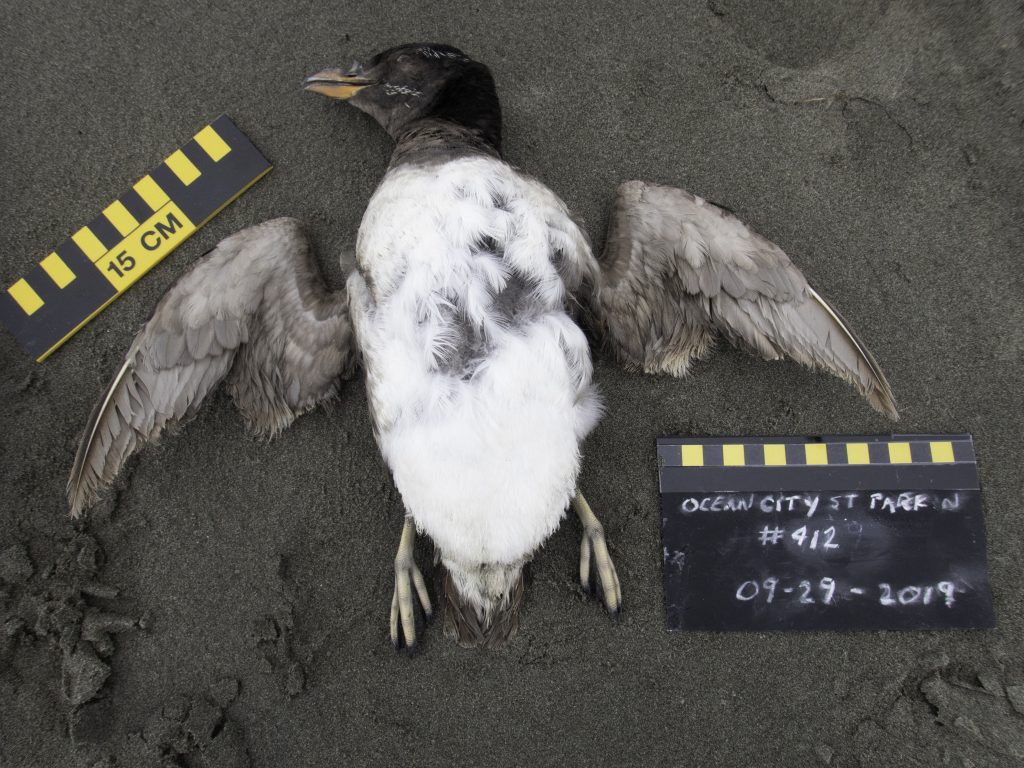
If the photo contains a slate with all of the key information about your bird then the photo can never become accidentally disassociated with the key measurement and identification data. The COASST Beach Name lets us know where the bird was found. The Survey Date tells us when. And the Bird Tag# names this bird so it is unique on your survey.
How many photos should you take?
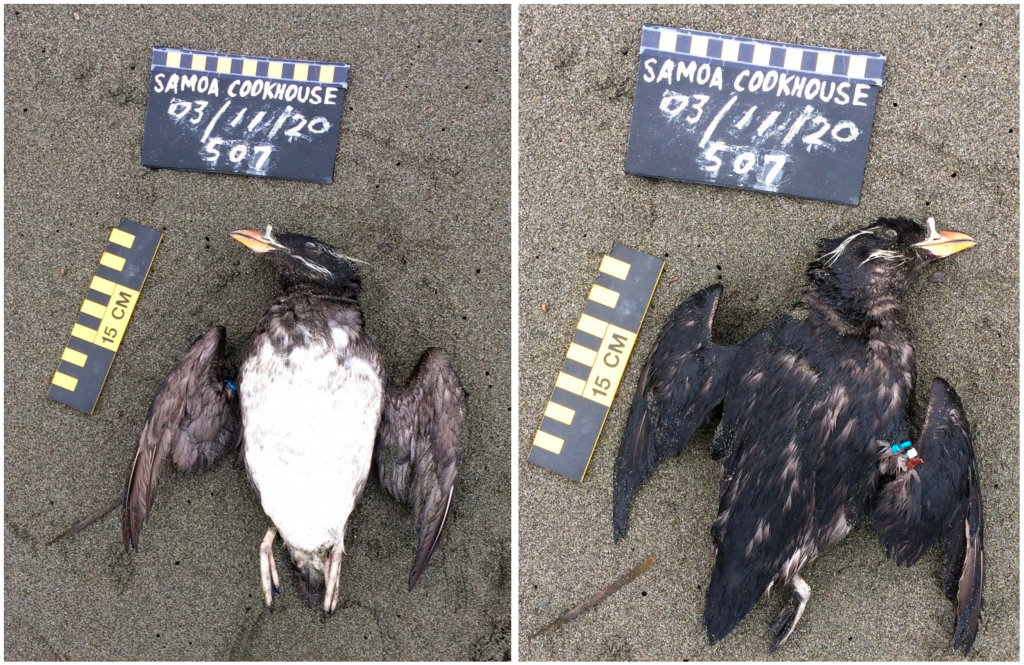
Each bird should get at least two photos: one of the belly and one of the back. In both cases the bird should be free of sand with the wings outstretched, feet visible, and head turned to the side. (If those body parts are present!)
In addition, a surveyor may choose to submit additional close up images. Those photos are especially useful to document rare cases of entanglement or oiling. If the photo icon (see left) appears next to information on your data sheet, that’s a reminder to take some additional photos!
Other reasons to take extra photos include: tricky species identity, features that you’ve never encountered before, or just a really beautiful (dead) bird!
Troubleshooting
What if the background isn’t good?
Do I need to take the bird home for professional lighting? NO! But…
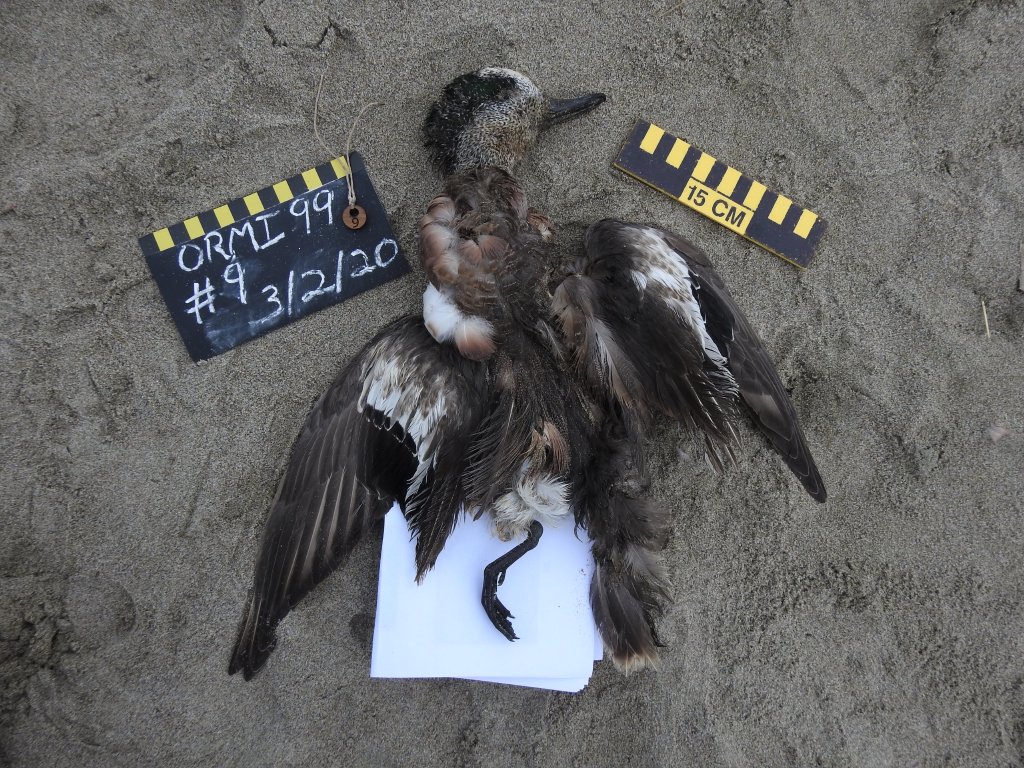
Sometimes the sandy or cobble background is less than ideal for a photo. A simple white piece of paper behind a wing tip or dark foot can make a world of difference, helping that body part stand out so that its features can be used in identification. Some COASSTers use a pillowcase or tarp that they can fold up and carry easily on survey.
What if there’s just one body part?
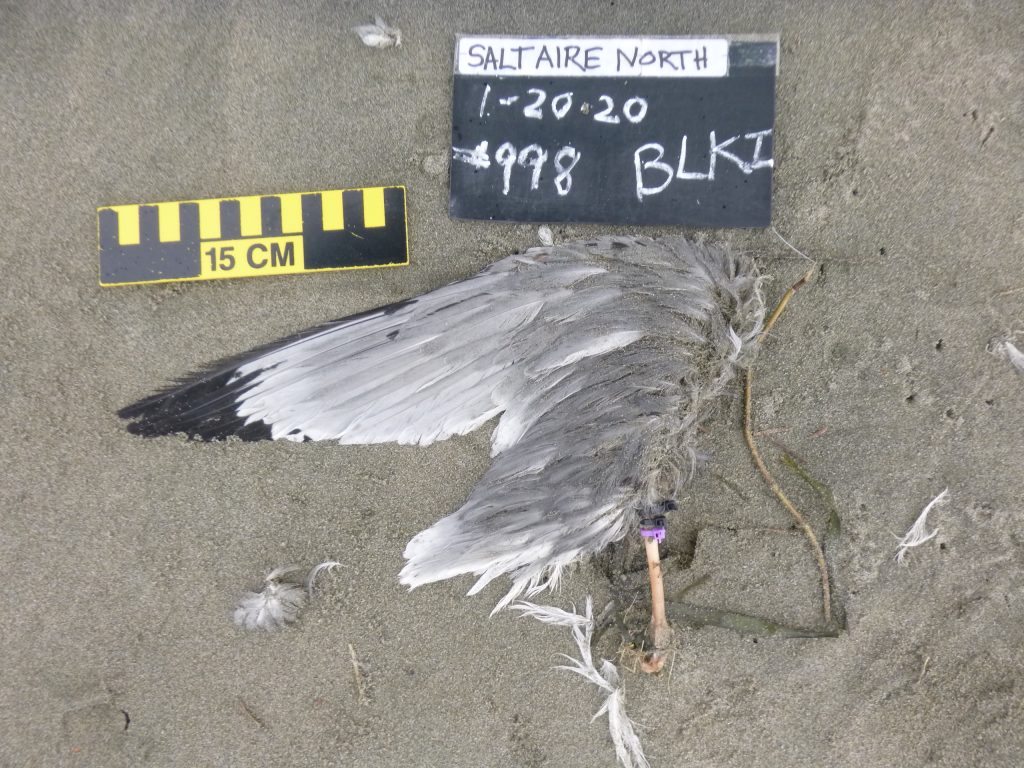
No problem! Birds are almost never intact, but it’s still important to pose any body parts that are present so that they are completely visible in the photo.
Thanks to the many COASSTers who have submitted excellent photos over the last two decades of COASST, especially those with photos featured in this post: Janet Wheeler and Bonnie Wood (Salt Aire North), Diane and Dave Bilderback and Gleneda Borton (OR MI 99), Gail Popham (Samoa Cookhouse), and Dan Dunphy and Elizabeth Kuehn (Ocean City State Park).